AF micro-adjustment for Canon EOS DSLRs

© 2010 Arash Hazeghi
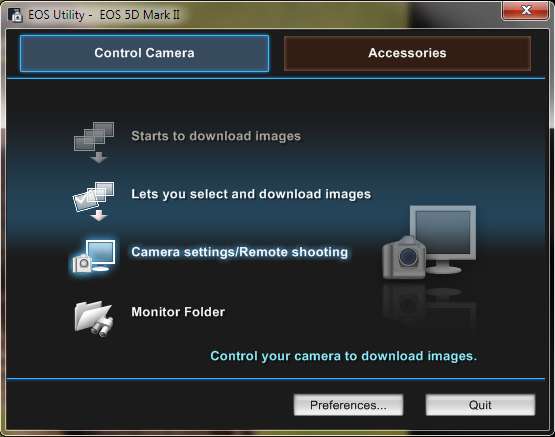
III. Performing MA using remote AF


We are going to use a map for this tutorial, first make sure your target is perfectly flat and pin it to the  wall at a distance ~20 times the focal length, for a zoom lens choose the focal length that you use most often. First use the spirit level on the tripod head to level the camera in
xy plane. It is essential that sensor plane is parallel to target. To do this you can use a small mirror, tape it to the target look through the camera’s finder until you can see the center of your lens in the mirror and lock down your tripod. Optical axis is now perpendicular to target and you are done with the mirror.

1) Connect the camera to your computer via the USB port, cancel any image download/pop-up application.
2) Run EOS utility.
3) Click on Camera setting/remote shooting icon:

I. Introduction


Thanks to scaling trends for CMOS image sensors most of today's DSLRs feature sensors with more than 12 million pixels, in order to take advantage of all of these pixels, it is essential that the projected image on the sensor be perfectly in focus. Due to various tolerances in manufacturing and calibration at the factory, offset focus error may be present in camera’s AF sensor, AF lenses or both. The degree by which this offset error will affect the perceived sharpness of a photograph will depend on factors such as aperture and subject distance. In order to compensate for this offset error most manufacturers provide a firmware feature called ‘AF fine-tuning" or "AF micro-adjustment". Here I explain an easy method to perform this correction in a more repeatable and consistent way. This method is primarily targeted for Canon and Nikon DSLRs which provide remote live view and remote focus actuation using manufacturer provided software. Other camera models can be calibrated similarly if firmware has identical capabilities.

II. Understanding Micro-adjustment


Before starting to perform AF micro-adjustment, it is important to understand what it can and what it can't do. MA can compensate for a fixed and consistent shift in the focus system. Even when perfectly calibrated, the AF system in current EOS cameras is not always reliable, depending on the conditions, AF might miss its target and lock at a random distance, especially when tracking a moving subject in AI-servo mode. MA will not help in these cases because the error is not due to a simple offset in the focus mechanism. Before performing any calibration you must confirm that there is a focus offset error in your camera/lens. Performing MA randomly in the hope of getting sharper images will just result in further confusion and frustration. For this purpose we are going to use a standard AF target and EOS viewer utility software that is included with all Canon DSLRs. In order to use this method you need:


· Latest version of Canon EOS Utility software, you can download this from Canon website.

· A Windows or Mac machine with a dual-core or better CPU capable of pulling live view from a DSLR in real time.

· Sturdy tripod placed on solid ground.

· A Focus target (anything with high contrast lines/patterns). This is a good example, you can also use a bank note.

· A small mirror.


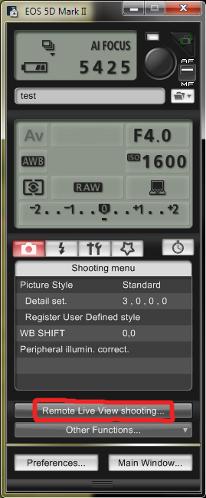
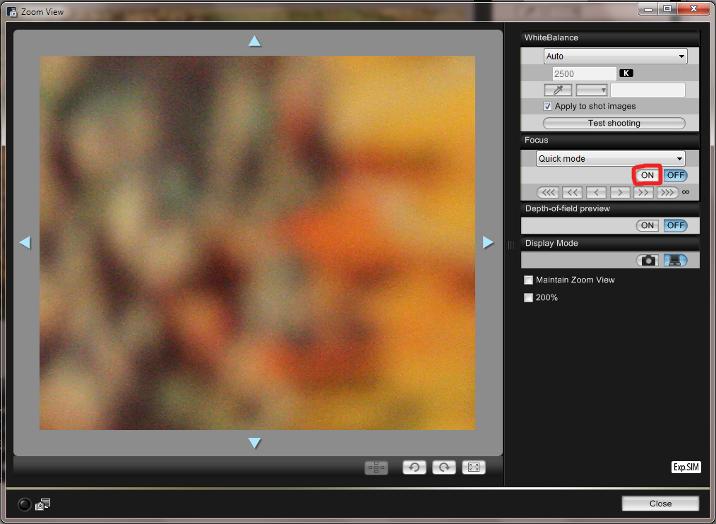
4) Click on Remote Live View Shooting this will open a new window with live sensor video feed:

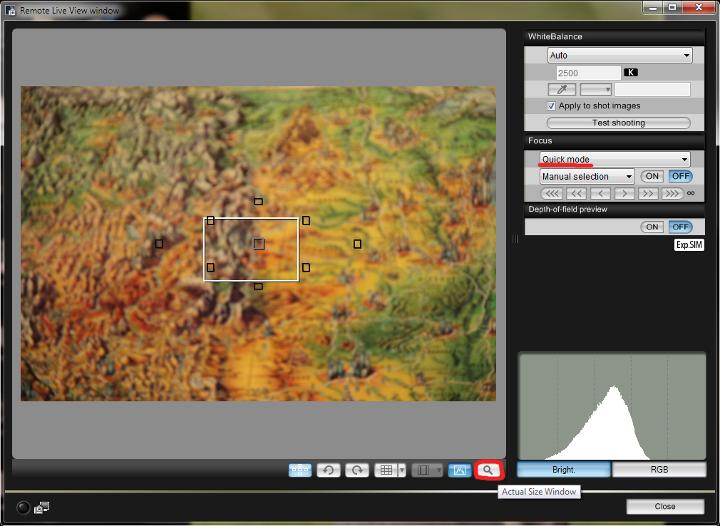
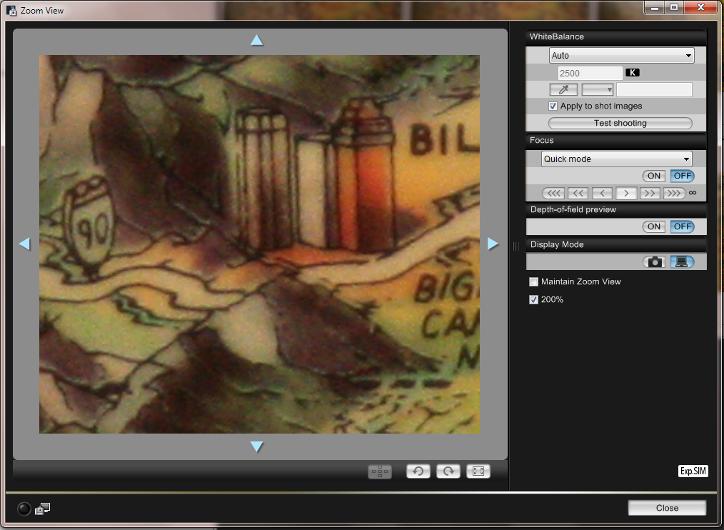
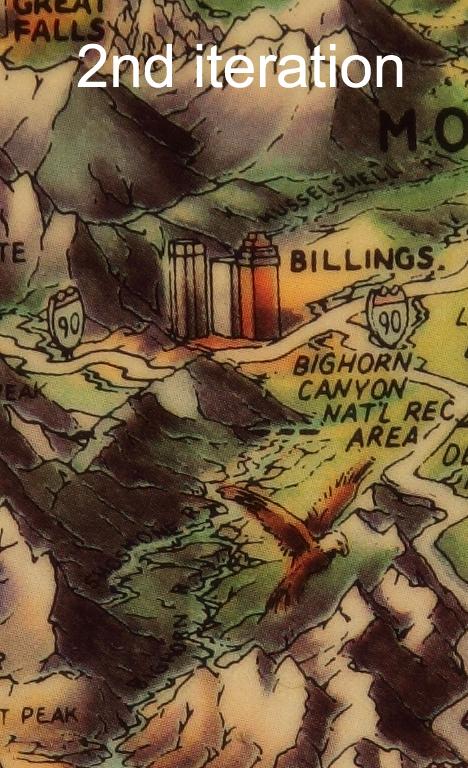
And after 2nd iteration the difference is already very subtle, the 5DMKII is resolving very fine dither texture on the map! This is with 24-105L @ 105mm f/4 .


Your camera and lens static AF should be adjusted with great accuracy now. 

5) Make sure AF is in phase detect mode (quick mode AF) that uses camera’s main AF sensor:

6) Choose the center AF point and make sure the white rectangle is centered on the AF point, this illustration is for 5DMKII, AF points pattern will be different for different cameras.
7) Click on magnifying icon for a full size view:

8) Click AFON button, the camera will now perform AF. 
9) Click on a 200% magnification, you are now viewing sensor output at 2:1. Note it is essential that tripod be placed on a solid surface plus nobody should walk in the proximity of the setup or you will see vibrations on the screen! 

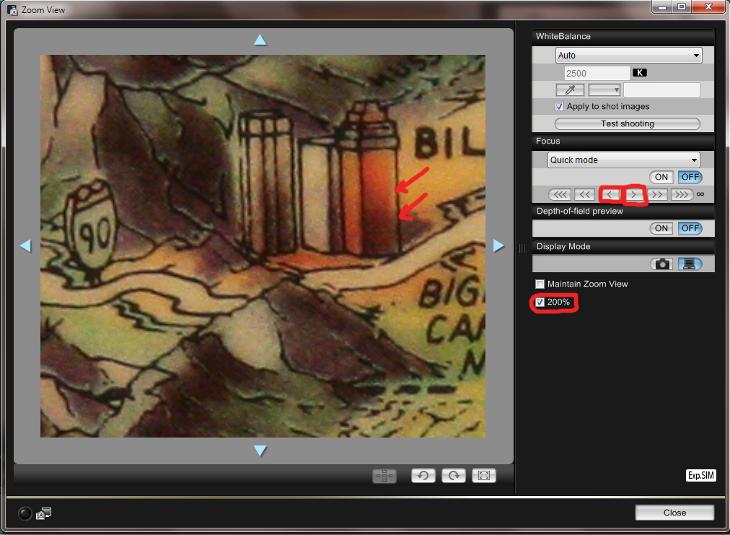
10) Now click on the ( > ) or( < ) buttons to shift focus back or front one click at a time until image appears sharpest on the screen, notice the contrast edges, you want them as crisp as possible. Write down how many clicks you have moved relative to the center, infinity symbol indicates far direction:

11) Repeat this a few times until results are consistent. 
12) Each click on the ( > ) or ( < ) corresponds to one unit in the AF micro adjust scale in the camera.
13) Disengage LV by clicking close in the Zoom View and Remote Live View Windows. 
14) Go to MA menu option in your camera and dial in the exact value noting the back or front direction. 
15) Go back to step 3 and perform AF again, if image is already as sharp as possible when you click 200% you are done, if not iterate until you can repeatedly get the sharpest image. You can shoot test images and transfer directly to your computer:

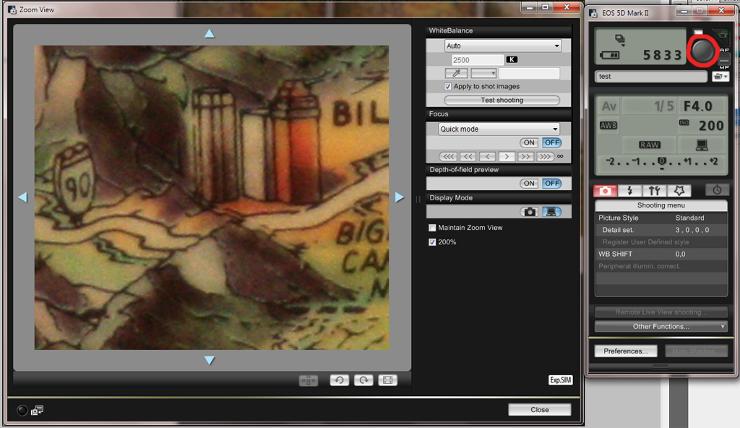
Press the shutter icon to snap a test image. If you have Canon DPP software it will automatically open in DPP once the file has been transferred. It is best to shoot in RAW mode. 

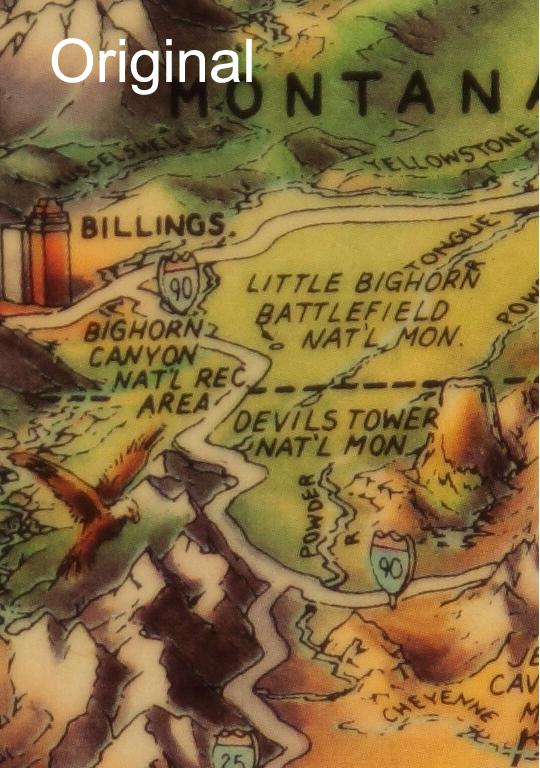
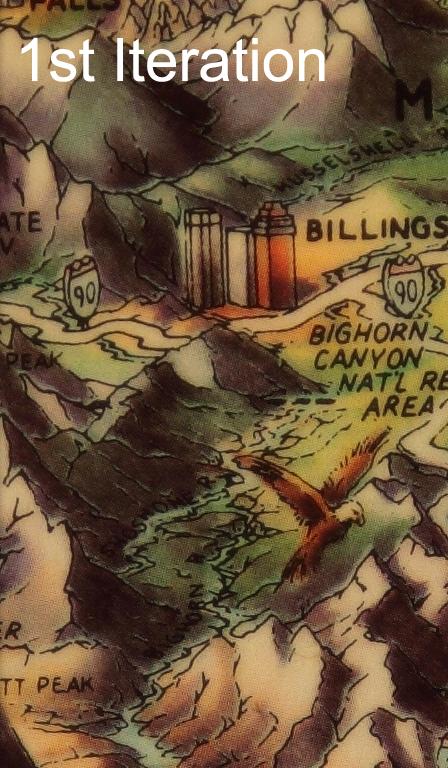
This is the result after one iteration of MA using the method above, notice how the fine dither is becoming visible. 

100% crop, RAW 

IV. FAQ


Q. What Canon bodies and lenses are compatible with remote AF described above? 

A. currently Canon EOS 50D,7D, 5D MKII and 1D MKIV support remote shooting, adjustment can be done with any EF or EF-S lens. 

Q. Is this method applicable to Nikon cameras, what Nikon bodies and lenses are compatible? 

A. Yes, this method can also be used with Nikon cameras but you will need the Nikon Camera Control Pro 2 software (sold separately) to invoke the remote AF function. Currently Nikon D300, D300s, D7000, D700, D3, D3S and D3X with AF-S lenses support remote AF function.

Q. Can I use a different target for adjustment? 


A. Absolutely, as long as target has enough contrast and remains perpendicular to optical axis.

Q. I get a different result every time I do micro adjustment, what should I do?
 

A. In order to make a meaningful adjustment you need to first observer consistent front or back focus, each time, make at least 5-10 focus attempts, to make sure you get consistent results before performing any MA.

Q. Will the camera remember if a TC is attached to the lens? 

A. Yes

Q. Is the MA applied to the active AF sensor or to all AF sensors? 

A. All AF sensors.

Q. I get soft photos when shooting birds in flight in AI-servo mode, will MA help me get sharp flight images? 

A. No. “Micro” adjustment is primarily for fine-tuning static AF in order to achieve maximum sharpness for critical situations when DOF is extremely shallow (ex. macro work at close range, portrait photography with wide open aperture etc.). The tolerance in the AF mechanism in all current Canon cameras in AI-servo and continuous-high shooting mode is at least 10 units or more on the MA scale so any fine adjustment is really irrelevant. Also keep in mind that for flight shots that are made at a reasonable distance there is always enough DOF to cover at least some parts of the bird, so even if the sharpest focus plane is slightly to the front or back it makes no visual difference in the output for flight conditions. Soft flight shots can happen for many reasons; it is extremely unlikely that you would achieve better flight performance by MA.

Q. I have performed MA with a zoom lens, I get good results at tele settings but at wide settings focus is bit worse, what should I do? 

A. MA can only adjust for one focal length at a time, in case MA at one end causes too much focus error on the other end the only solution is to compromise and pick a setting that works best for a number of focal lengths.

Q. I have performed MA on my super telephoto lens, everything is good, but when I take images in the field, especially at long distance my photos are soft. 

A. MA should be done at least 20X the focal length, if you constantly shoot subjects that are farther, it is better to do MA at a longer distance like 50X the focal length, you may need a very large target for that. If you do setups at close range then you can perform MA at closer distance. Also keep in mind that atmospheric distortion has a great effect on the sharpness of the photos taken at long distances. Thermals currents as well as moisture in the air cause dispersion in the optical path between the subject and the lens causing softness and hazy photos. This effect is often hard to see in the finder but can be easily seen on the camera’s LCD screen at high mag. Put your camera on a tripod, activate live view and zoom to maximum magnification. Now try to manually focus on the subject you intend to photograph, if the image is hazy it is most likely the effect of thermals/haze in the air. Early in the morning or later in the afternoon when temperatures are cooler are ideal times for using super telephoto lenses. 

Q. My lenses did not require MA on my old camera, how come they need MA on my new camera, should I return it? 

A. No, every camera is manufactured with some tolerance in the AF mechanism, this is not a defect. As long as you can get sharp and consistent results after performing MA there is no reason to return or send your gear for repair.

Q. How should depth of field (DOF) be distributed around the sharpest plane of focus?


A. It depends on the particular optical design of  the lens, some older lenses where designed so that 1/3 of DOF was in the front of the focus plane and 2/3 was on the back, however this is not a general rule and many lenses are not designed by this rule. It is somewhat difficult to measure the DOF accurately, a simple method is use of a 45° target but this method is not very reliable as a slight drift from the  45° angle with respect to image sensor will change the DOF distribution. As long as you can get sharp consistent focus, DOF distribution should not be detrimental to the final output.


Q. The optimum MA value for my lens/camera is too large or exceeds the MA range, should I send the camera for calibration?


A. Yes, in this case only Canon can adjust the camera/lens.


Q. Do Canon use similar MA procedure for calibrating lenses/bodies at their factory/service center? 

A. No, canon use a much more sophisticated method for calibration, they can physically align and adjust the sensor or lens elements, so if you cannot get sharp results with MA you should send your gear to Canon for calibration.

Q. what are the units for MA? 

A. The unit for MA is not mm or cm. Canon use ultra-sonic step motor for driving the focus elements, the USM is pulse modulated, every pulse is equal to one servo step which is finest discrete shift in the system. The actual displacement of focus plane depends on focal length, aperture and subject distance.


Q. Do MA values change with time?


A. It is possible due to thermal drift in the AF sensor, if you use your gear professionally check at least once every season.

Q. Do Canon recommend this method for MA? 

A. No, Canon do not endorse or recommend any particular method for MA.

© 2010 Arash Hazeghi, all rights reserved for illustration only.

Zoom window

Active AF sensor