How to get close to your subject
Getting close to skittish birds is often the most challenging part of avian photography. Raptors are among the most skittish birds, sometimes impossible to approach without some kind of blind. One way to get close to skittish raptors is shooting from your 4X4, however this is not possible at all locations. For reasons not clear to me, every once in a moon you will find raptors that are very friendly and perfectly approachable on foot. A colony of migrating birds in close proximity to an area abundant with human activity, such as hiking trails, parks, golf courses etc. is often approachable as the birds become used to people, especially during nesting season. Juvenile birds are easier to approach than adult birds. Nevertheless, such opportunities are few and far in between so it’s important to make the most out of these fortunate encounters.
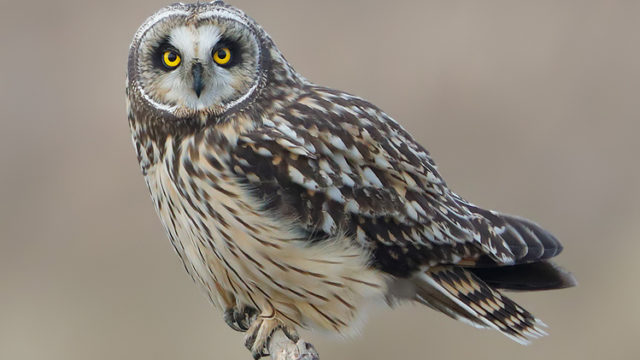
I had one such opportunity in British Columbia last month, where I located a receptive colony of short-eared owls, a subject high on my list. When photographing these gorgeous owls, I noticed a number of photographers around me trying to photograph the owls with all kinds of equipment from small cameras with short lenses to 800mm lenses on large (and probably heavy) tripods. I noticed that unfortunately most were using incorrect approach techniques which leads to disappointing results. In this short article I am going to explain how paying attention to small details can make a world of difference in the final results.
When you first see a life bird, or a highly desirable bird on top of your list, the first step is to keep calm and try to suppress the excitement. The rush of adrenaline at first sight might send you running towards the bird at a bad angle ruining the opportunity for good. Stay clam and do not make sudden or nervous movements, most birds are sensitive to sudden movements as opposed to steady moves. Before you start approaching the bird pay attention to two important factors 1) position of the sun (for clear or partially cloudy skies) 2)background behind the bird from different angles.
Ideally you want the sun to be behind you and shining on your neck when making photos. Many photographers, even those with advanced equipment, overlook this fact. This is especially important for raptors and owls as they have deep eye sockets. Even a tiny shadow on the pupil can ruin the whole shot. There is no point in shooting against the sun or with strong side light unless you want to make a silhouette. If you just approach the bird without paying attention to the light, you may find yourself in a situation where the bird is right in front of you but against the sun. Trying to go around it at close distance many flush the bird and with it will go your opportunity.
Once you have determined the position of the sun, if the sun is not already behind you, first walk away from the bird but towards the sun. This will put distance between you and the bird but will align ou with the sun. When you face the bird the sun must be behind you. At this time you can start your approach towards the bird. Approach slowly in a zig-zag path. This will reduce the chances of the bird taking off. This is shown in Fig. 1 below
To make sure you are on the imaginary line that connects the sun to the subject. Look at your shadow, it must be pointing right at the subject.
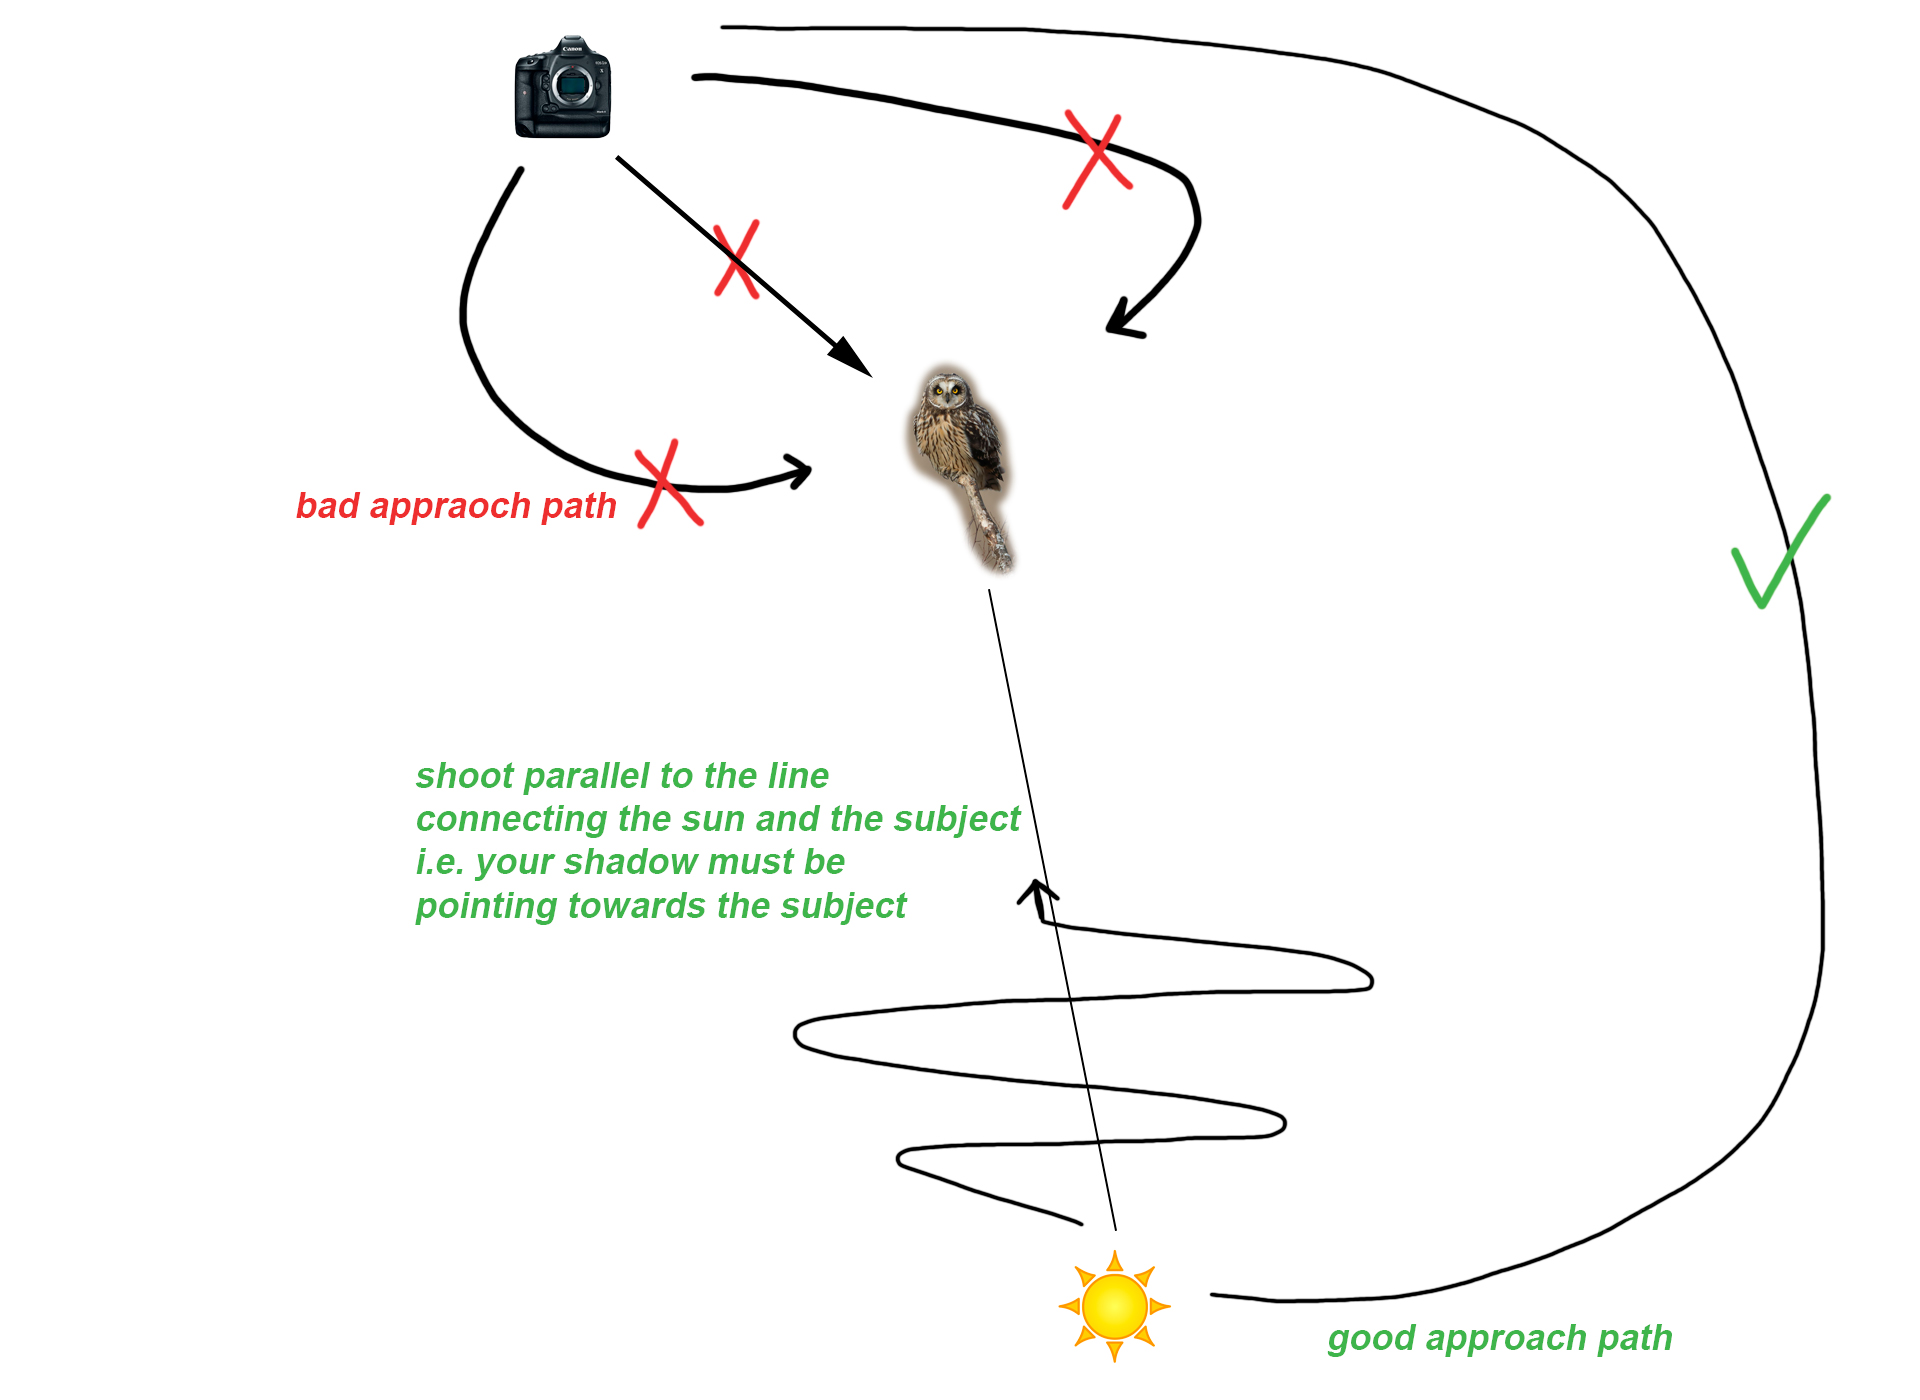
Example of a correct approach path for a skittish subject
Pay attention to the background and choose an angle that provides a smooth non-distracting background. You don’t want distracting or man-made objects such as houses, cars or a concrete wall behind the bird. Sometimes you cannot find a good background with the sun directly behind you. In such situation try to find a good background within 45 degrees of the imaginary line connecting the sun and the bird as shown in Fig. 2. Note that one eye will be shaded when the bird is looking directly at the camera. If the light is strong, a side profile shot might work better than a direct look with one eye shaded. Typically, if the the angle between camera’s line of sight and the imaginary line connecting the subject to the sun is greater than 45 degrees, the image will have a strong side-light look, which in most cases, ins’t very attractive.
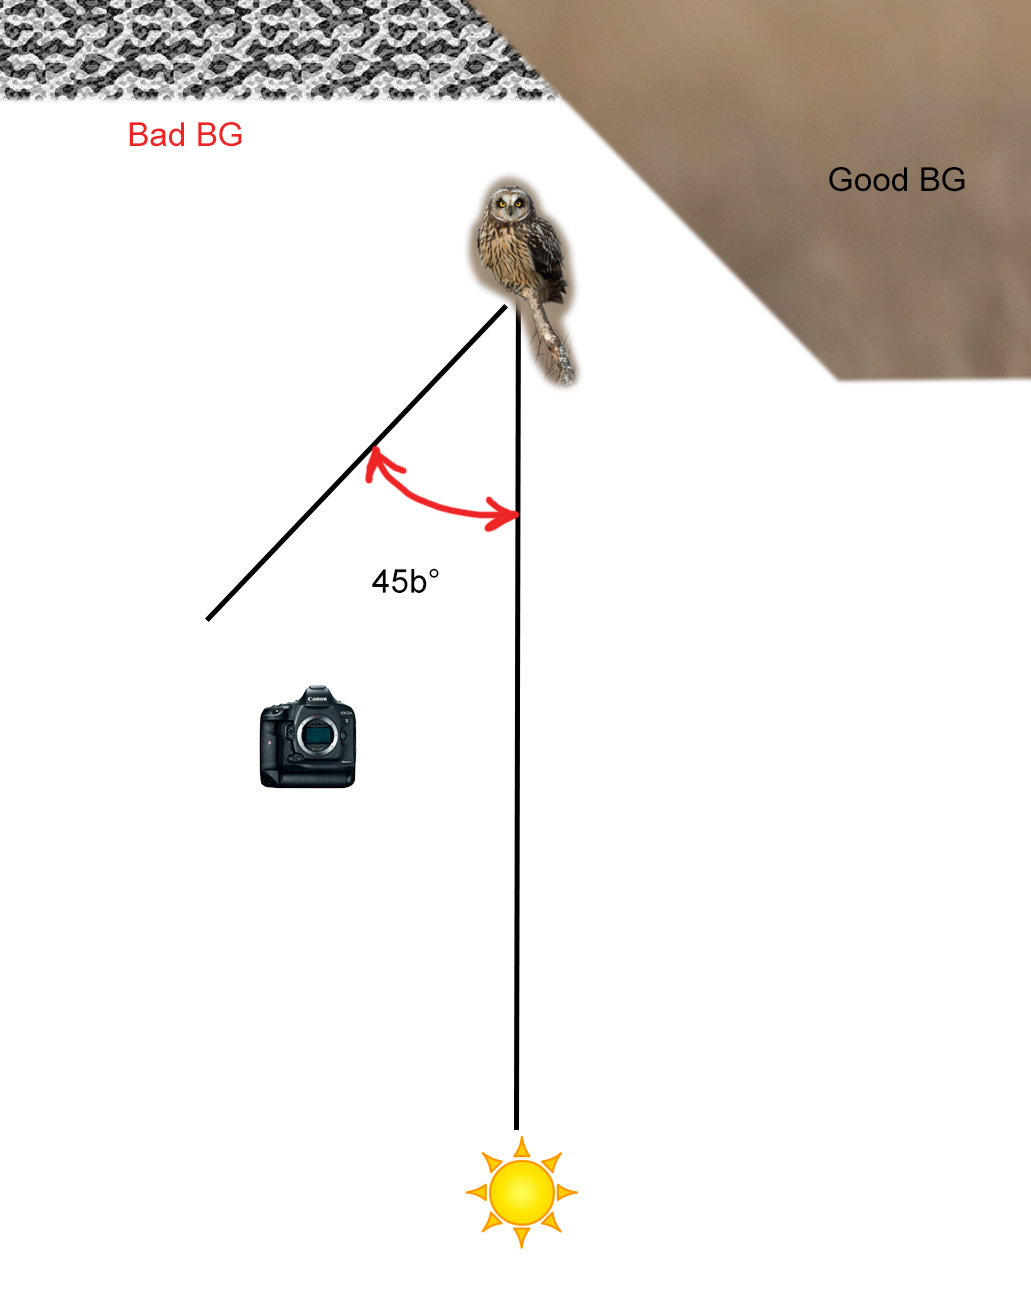
Fig 2. Pay attention to the background. Adjust your position within 45 degrees of the imaginary line connecting the sun to the subject to fill the frame with an attractive BG behind the subject.
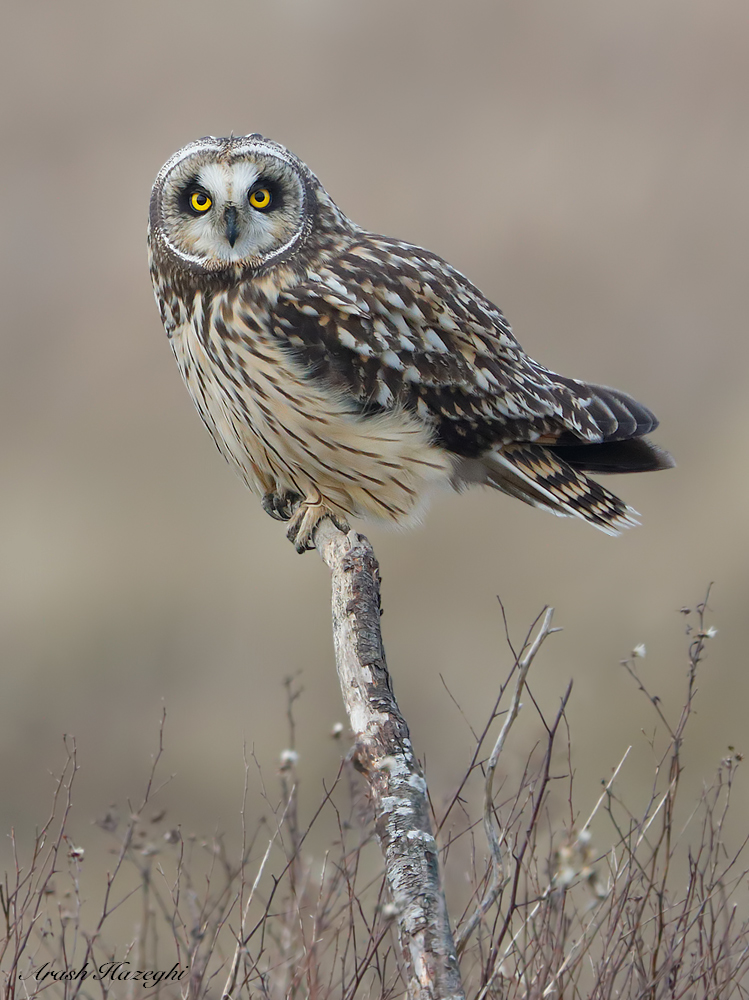
The image below was made with all the points mentioned above taken into consideration. At the time of capture, my shadow was perfectly pointing to the owl. I was able to get a perfectly symmetric look with both eyes open and staring at the camera.
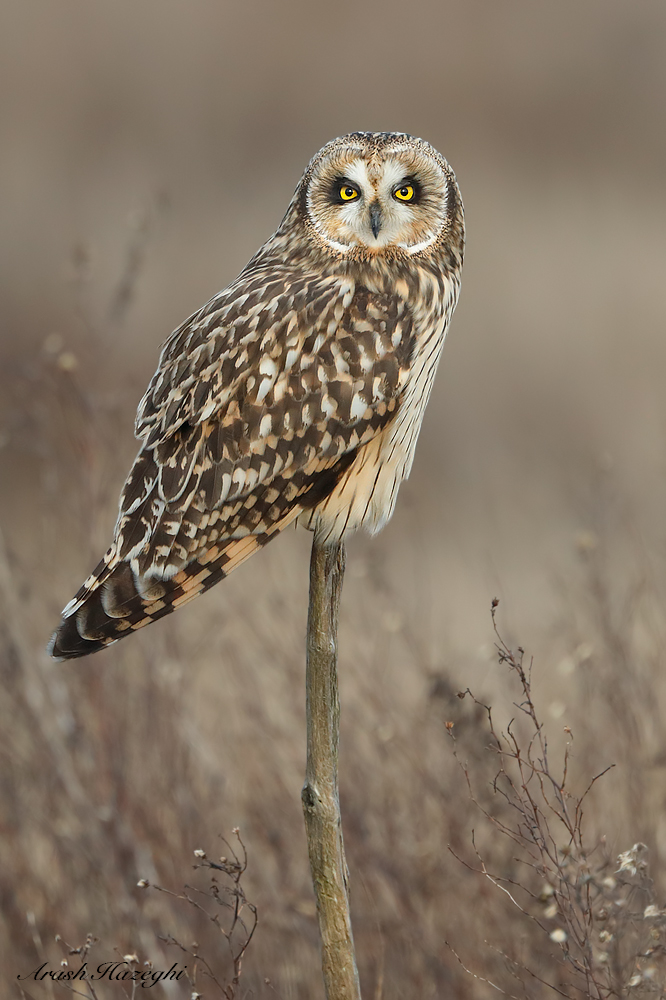
Short-eared owl. EOS-1D X MK II EF 400 DO II + 1.4X III. ISO 2000. f/5.6 at 1/2000 sec. Hand held. Processed with DPP 4.5.
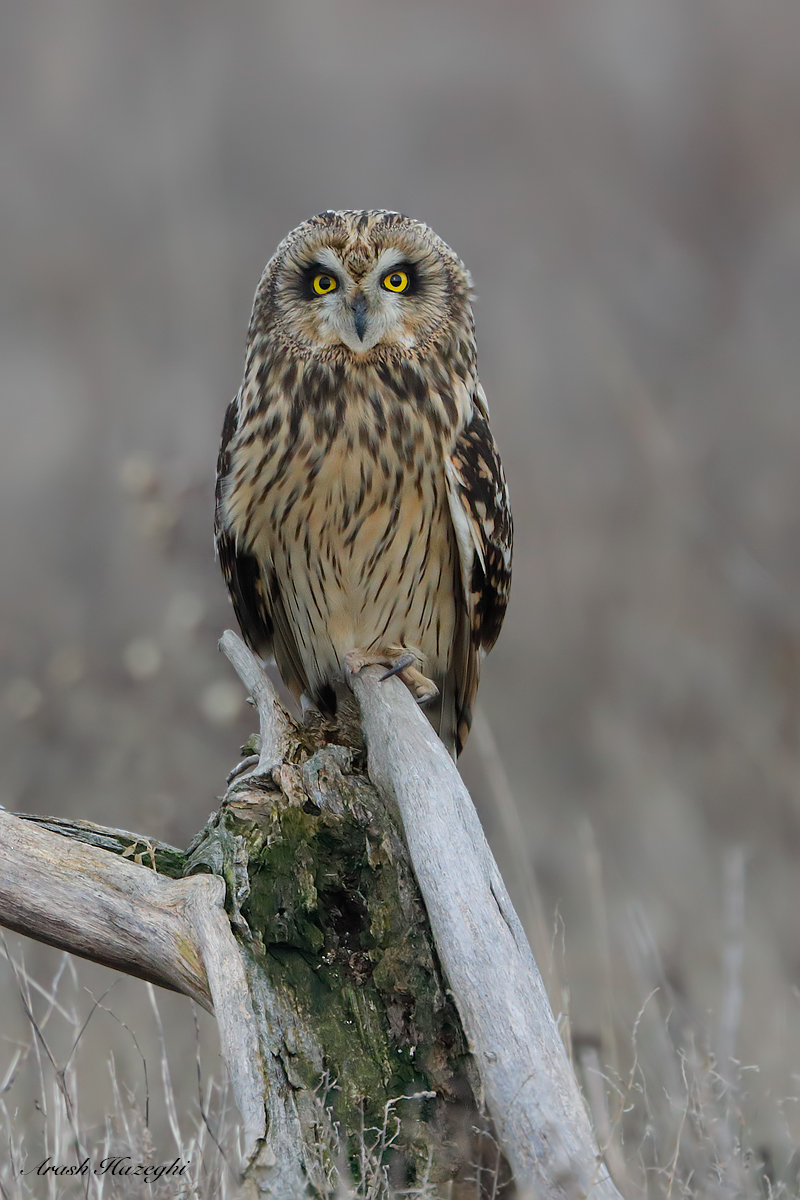
A partially-cloudy sky with soft light is great for making owl photos, make sure you compose with the best background.
Short-eared Owl (young bird). EOS-1D X MK II. EF 400mm f/4 DO IS II + Extender 2X III. ISO 2500. f/8 at 1/800 sec. Hand held. processed with DPP 4.5. Click on the image to see larger.
If the light is very soft (under a partially cloudy sky) you might be able to equalize brightness between both eyes in post processing. Select the shaded part of the face in Photoshop using the lasso tool, then feather the selection by 4-5 pixels and then use the brightness tool to increase the brightness. Make sure you don’t over do it.
If, due to off-angle lightning, only one eye has catchlight it’s best to add a similar catchlight to the other eye in Photoshop to make them symmetric. If you brighten the shaded eye but don’t add a catch light to it, the image may look strange and unnatural. The example below demonstrates this point. The original frame was taken with partially cloudy skies. The soft light allowed me to frame the owl against a nice background. Although both eyes are well lit, owl’s left eye is just slightly brighter and has a more defined catchlight.
Shoer eared owl. As captured by the camera. EOS-5D Mark IV, EF 400mm f/4 DO IS II + Extender 2X III. ISO 2000. F/8 at 1/1000 sec. hand held. RAW processed with DPP 4.5. Note that the owl’s right eye has a muted catchlight and is slightly darker. click on the image to see it larger.
I selected the right half of the owl’s face in Photoshop using the lasso tool, then feathered the selection by 5 pixels to smoothen the transition, then I increased brightness by +14 in this area to make it identical to the other half. I cloned the catchlight from its left eye and placed it on the right eye to make both eyes perfectly symmetric. It’s minimal processing and a very subtle change, but it makes a noticeable impact on the overall image. Click on either the image above or the one below and then use the arrow-keys to view them back to back. Which one do you prefer?

The same image with the processing explained above. It looks more natural and pleasing.click on the image to see it larger.
Needless to say, this technique is only effective if the light is soft and there are no deep shadows on either eye.
Another factor to take into account when approaching the bird is your final distance to the bird and the type of equipment you are using. In some cases there might be obstacle between you and the bird which limit how close you can get to it, such as a canal full of water, private property etc. Also you should not get inside a raptor’s comfort zone, which is typically at least ~16 ft (5m). Folks with small cameras and short lenses walking up too close to birds of prey usually ruin the opportunity not just for themselves, but also for other photographers who may have long waited for such moment. Uusally, you need a lens + extender combination with a focal length of 500mm or longer to photography an average-sized bird of prey. The example above was taken at 560mm with EF 400mm f/4 DO IS II + EF Extender 1.4X III. If you don’t have a long lens, try to concentrate on environmental shots instead of trying to get too close. Include more of the attractive habitat, if the perch is nice, you can include more perch in your frame.
The image below is from a belted kingfisher which is an extremely skittish bird. Despite using a long focal length (840mm with the EF 600mm f/4 IS II + Extender 1.4X III), I was still too far from the KF to make full-size portrait. Instead I opted to use the beautiful perch and the surrounding vegetation to create this frame. Had I attempted to walk closer to the KF, it would have flown off, leaving me empty handed.
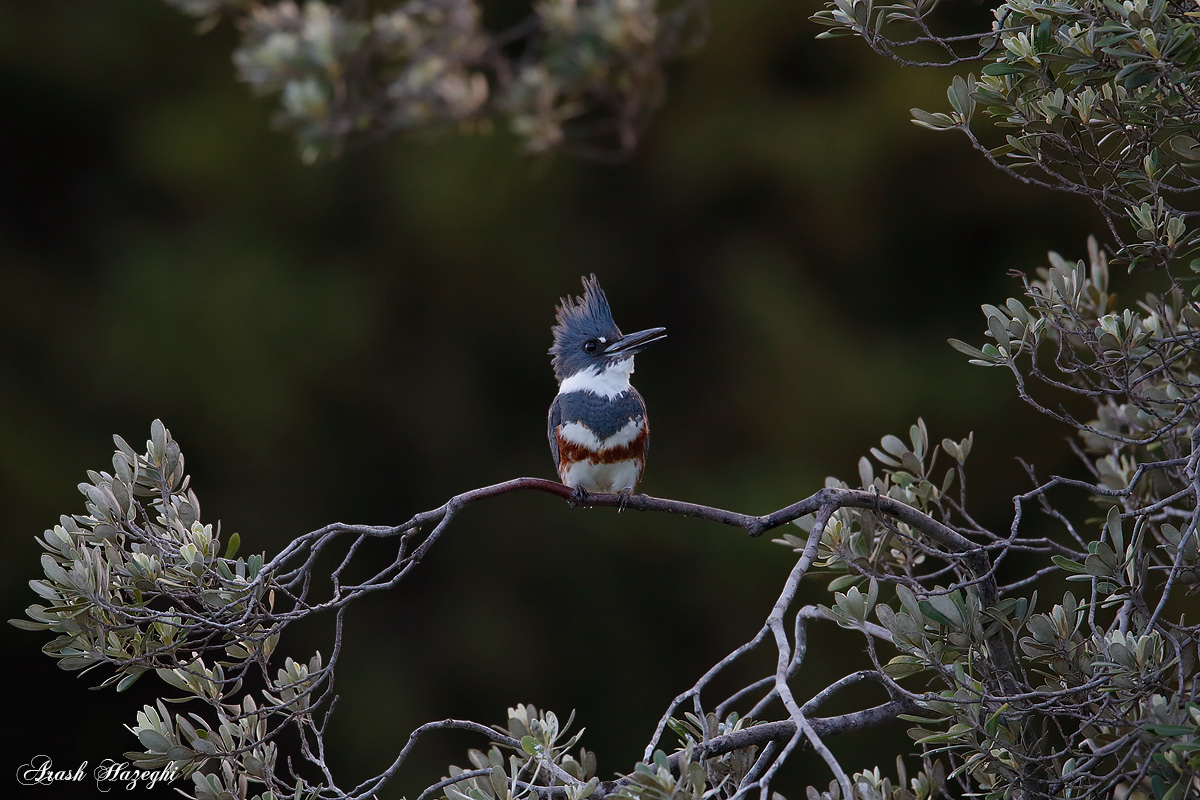
Belted Kingfisher. EOS-1D X, EF 600mm f/4 IS II + Extender 1.4X III. ISO 2500. F/5.6 at 1/1250sec hand held. Processed with DP 4.5. Click on the image to view larger.
Finally have patience, sometimes you are at the right position with the sun behind you and against an attractive background, however the bird might be looking the other way or have its eyes fully or partially closed. Just wait, it will eventually look at you with both eyes wide open. This could happen in an instant and last less than a second so be prepared to fire off. That’s why I use burst mode at full speed, even for perched birds. Shooting at 14 fps with the EOS-1D X Mark II, sometimes there are only 1-2 frames that have the absolute perfect head angle and eye contact…
Also remember the location of each perch, chances are the raptor would come back to any of its favorite perches again at a later time.
Good luck!
thanks ari. great article.
Wow. That was a great write up, I am not a photographer, but your passion is evident in your work. Thanks for sharing.
Briand
great article, thanks for sharing
Excellent images, Ari. And thanks for the solid reminders regarding technique. Your thoughtful approach really paid off.
Nice article. The demonstration of processing the eyes of the owl was interesting. The effect is subtle but a nice improvement in an image that was already excellent.
Very interesting article. I love learning about how others’ fieldcraft.
A few questions I have after reading it:
– Do you approach the bird while crawling on the ground or do they tolerate you moving around standing?
– Can you be more specific about the speed and length of your “zig-zags”? Do you take just one step per minute or do you move in faster? do you move like 2-3ft left and right or are your zigzags wider?
Hi P.-A.
usually it’s no possible to crawl due to the terrain. For raptors it makes little difference as they see you either way. I usually take a step every couple of seconds.
best
Everything said here is spot-on.
I would like to add one point – be tactful in approaching birds. If you suddenly alter course and head directly for your quarry, it will know you have seen it and will probably leave. Take time and don’t stare at it – watch from ends of eyes and through your eye-lashes. Drift towards it if possible, while pretending to be interested in something else. If you swing round while walking apparently towards some thing else and gradually alter course to a better viewpoint, you may be able to get closer. And better a more distant shot of bird in landscape than no bird at all. Take care not to alter shape as you move your camera -keep arms close to body and don’t stick elbows out.
One feature which may alarm birds is the distinctive scissor action of human legs walking – so shuffle if necessary, or use any waist-high cover to your advantage.
I really enjoyed this article and the fine examples of your work. Thanks for sharing Ari.
Thank you ! Very helpful
Excellent article Ari,
Those owls are beautiful. Thank you for sharing the photos.
Great useful advise.