How to set exposure in bird photography
One of the important factors in creating a high quality image is getting the exposure right in camera. Why is getting the exposure right in the camera important? Highlights that are fully blown (clipped) in RAW can never be recovered. Images that are underexposed may be corrected in post processing, but it requires careful processing and noise reduction. With small-sensors cameras such as the Canon 7D series underexposing more than one stop usually results in a poor quality image. EOS-1DX (MKII) and the EOS 5D MKIV, on the other hand can handle several stops of underexposure relatively easily. Nevertheless, images with extreme exposure adjustment may not be eligible to enter certain competitions or eligable for publication where the original RAW is used. In any case, it is best to get the exposure right in the camera, which also saves time in post processing.
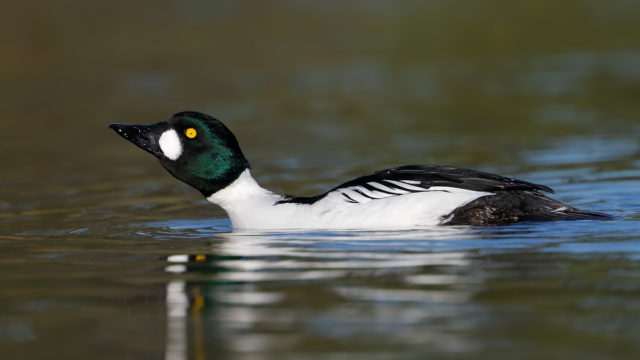
But what is the best way to set your exposure? There seems to be some confusion on the internet forums about this. Some photographers rely on and recommend using the histogram. Histogram works just fine for landscape photos but it is not a reliable method for bird photography. This is because the subject, i.e. the bird often occupies a tiny percentage of the frame. Even when a bird is reasonably large in the frame to make it a keeper, it contains a small fraction of the total pixels in the image. The image shown below is a full-frame RAW capture with the 20.1 Mega-pixel EOS-1D X Mark II. The golden eye is descent size in the frame. I selected the golden eye in Photoshop, the pixel count is 882,211. Compared to the full-frame (20.1 Million pixels) this is roughly 4.5% of the total pixel count! The histogram displayed on the rear LCD of the camera, on the other hand, is calculated from all the 20.1 million pixels in the frame.
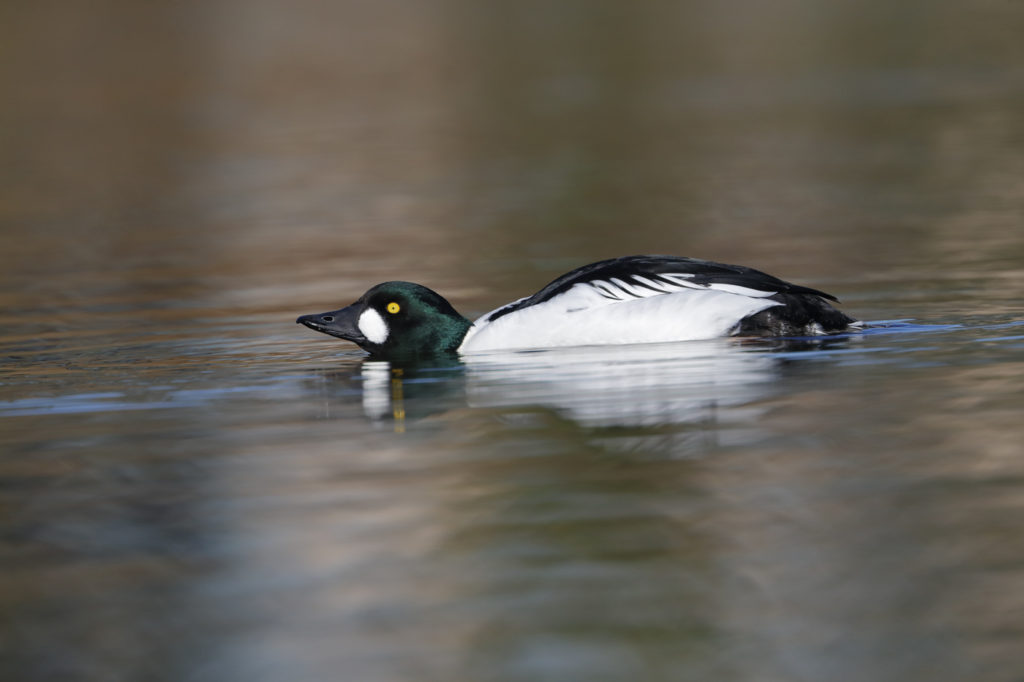
Golden eye. EOS 1D x Mark II, EF 400mm f/4 DO IS II + EF Extender 2X III. ISO 800. F/8 at a/3200sec. Hand held. Manual exposure. The bird is large enough in the frame, but it contains <1% of the pixels in the frame!
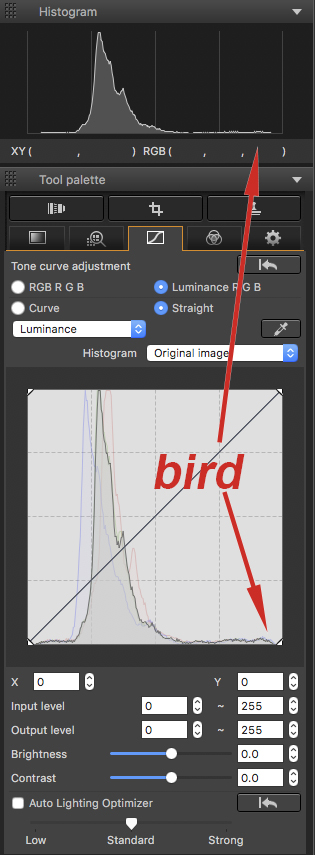
14-Bit RAW and 8-Bit RGB histograms for the image above in Canon DPP 4.5. The histogram displayed on the camera’s rear LCD is similar to the lower one. The bird is the tiny “hump” near the right border, it is hardly visible. The large peak is NOT the bird but the background.
The screenshot above shows the histogram for this photo in DPP4.5. It is obvious that the histogram displayed is dominated by the background. The bird is the tiny hump on the far right, it is almost invisible. Therefore if you were to peg the background peak to the right 3rd of the histogram the whites will be totally blown. Furthermore, in images where the bird has similar colors to the background it is impossible to distinguish the bird and the background in the histogram and tell what is what. The goal is to expose properly for the bird, not the background.
So what is the best way to tell the correct exposure for avian photographs? I find that the most reliable method for checking exposure on the rear LCD is to rely on the highlight warning, aka “blinkies”. When exposure warning is on, the areas with an RGB value of 255 will blink, clearly showing the hot spots. Because the image on the camera’s rear LCD is a 8-Bit compressed JPEG file, a blinking area may be recoverable using the data that is in the 14-Bit RAW file. The extent to which you can recover the highlights using the RAW, depends on the camera model. With high dynamic range sensors such as the one in EOS-1DX Mark II you can often recover a solid blinking area. With small-sensor cameras like the EOS-7D series, only small blinking patches will be recoverable. I usually increase my shutter speed until I don’t see any solid blinking area to be on the safe side. With both EOS-1D X and EOS-5D series you can easily increase the exposure on the dark tones, but if a bright area is clipped there is not much you can do about it. In the image above I did have two small blinking patches but the highlight detail was preserved in the RAW. This is as far as I am comfortable pushing it.
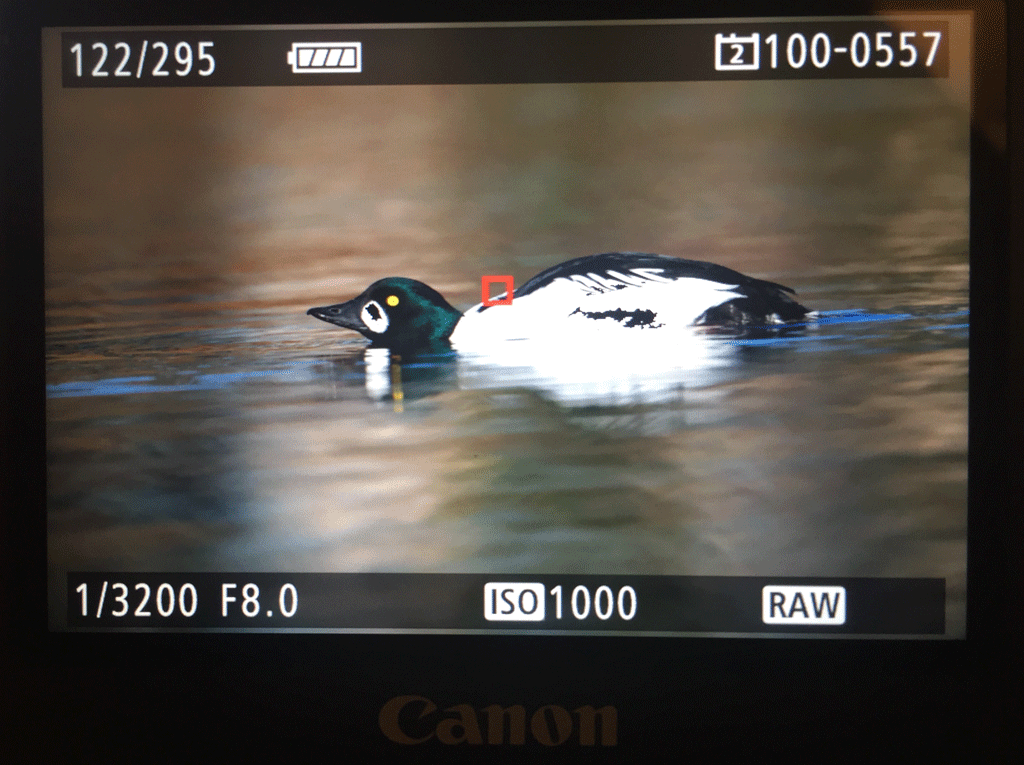
Highlight warning as displayed by the EOS-1D X Mark II. Click on the image to see the blinkies flash.
Below is the image after processing in DPP4.5. I used a highlight adjustment of -3 to bring out slightly more detail in the whites.
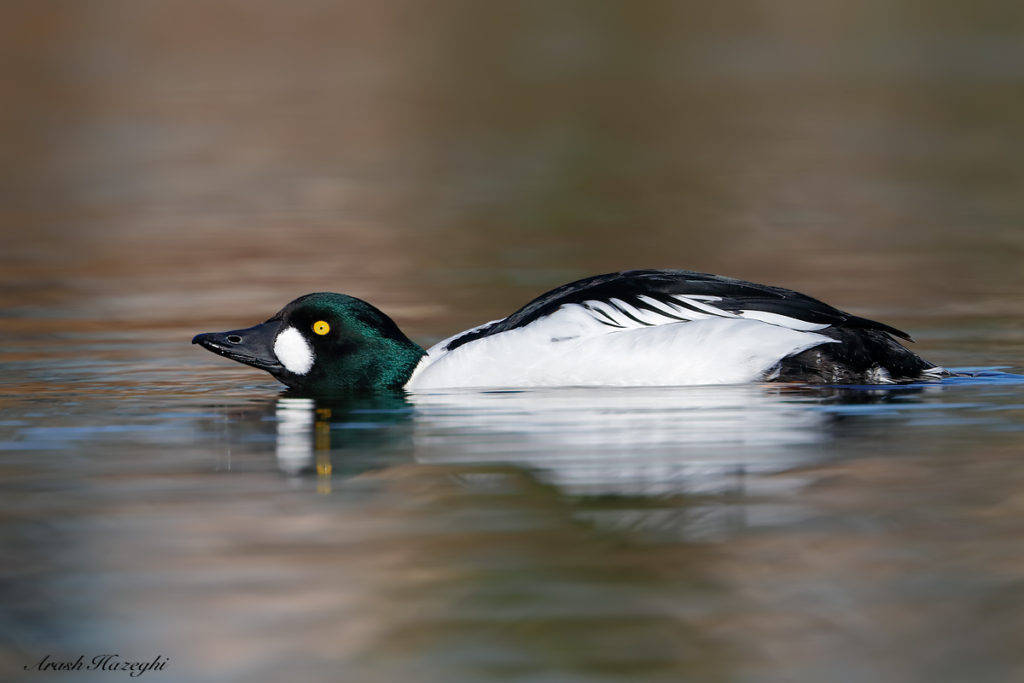
Image shown above after processing with DPP 4.5. Click here to see in high def. format.
For bird photography, I also prefer to use manual mode at all times, especially for in-flight shots. As explained above, because the bird occupies a tiny percentage of the frame, the camera’s meter will set the exposure for the background. This means the bird will be blown when it flies against a dark BG, and it will be severely underexposed when it lies against a bright BG. With manual exposure set for the bird, the exposure remains locked as you pan with the bird which means all frames will be exposed properly so long as the bird stays in the light.
I hope this quick tutorial will help you setting the exposure in the field.
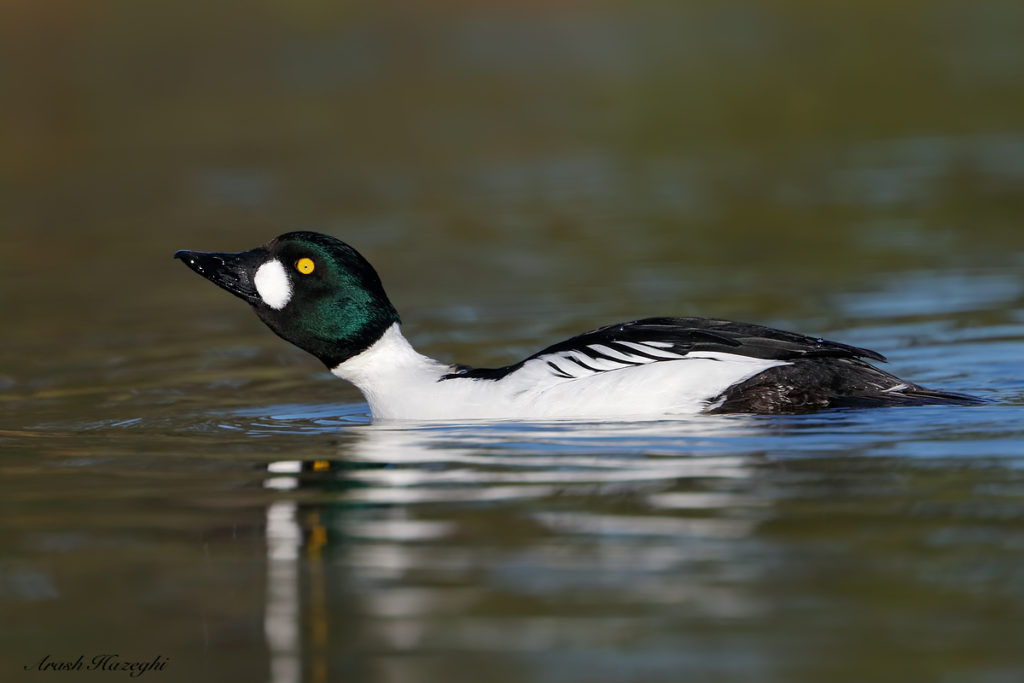
Golden eye. EOS-1D X MKII with EF400mm DO IS II + Extender 2X III. ISO 800. F/8 at 1/2500sec. Hand held. Processed with DPP4.5. Click to see larger
A well written clear explanation of exposing for birds. Very informative, thanks for sharing, even though a lot of us have probably gotten our own methods/habits, with some bad, this points out the potential problems that can be encountered with certain methods.
It’s difficult to argue against using manual mode as long as the light is consistent and the bird(s) aren’t moving in/out through shadows. The question is dependent on balancing the exposure triangle; ISO, Tv, Av to make the best possible image and desired effect. To some extent that depends on the equipment (camera noise and lens aperture limitations) and setting. It’s difficult to assert absolute rules but I usually start with a modification of the “sunny 16” which as folks recall is for sunny days set the ISO to 100, f/16, Tv 1/125. So the modification starting point is: bump the ISO to 400, cut the f to 8 and push the Tv three stops to 1/1250. From there then alter the exposure triangle based on available light, subject, and intent using the blinkies on the histogram as you describe.
This is only one method and there are certainly others such as metering off of the subject/background and making alterations accordingly.
Hi Adam
for bird photography the shutter speed is determined by subject and is fixed. for BIF you need 1/2500sec or faster (I prefer 1/3200 sec) while for perched birds it is possible to get away with slower SS. Aperture is set to wide open, that leaves only ISO to be adjusted accordingly. My starting ISO is 400 and goes up to 6400 accordingly.
Great article and thanks so Ari. How do you set exposure for the bird? Do you mean you use spot metering?
Hi Mark, the best method for setting exposure for birds is manual.
I recently purchased your flight photography guide and find it very helpful. I like the parameters you set for shutter speed. others have suggested starting at 1/1000 and I find that limiting.
Thanks
Arash: Great tutorial, very much respect your work! I think that your calculation for the goldeneye is incorrect. The entire goldeneye duck occupies about 5% of the frame, not 0.3%.
Hi Ari,
I hope you don’t mind, but I wanted check your calculation as I couldn’t believe that the goldeneye accounted for such a small area of the image. I took the liberty of downloading the small image that you posted (second on the page, “FF-golden-eye.jpg”) so that I could do the exercise for myself. I opened it in Photoshop and selected the area of the duck above the waterline using the magnetic lasso tool (not perfect, but I’m checking orders of magnitude here). It accounts for 62,641 pixels in the small jpeg that has dimensions of 1400 x 933 pixels (i.e. 1,306,200 in total).
62,641 / 1,306,200 x 100 = ~4.8% of the total pixels, like Mike suggested. Have you cropped the original image prior to posting it on this page? If not, then I’d suggest you do a remeasure…
Stuart.
(P.S. I’ll delete the image of the goldeneye from my HDD once this is resolved!)
Thanks a lot guys, I think there was a glitch in the PS histogram counter, the golden eye has ~882K pixels so about 4.5% of the frame.
Thanks for pointing out the error
Blinkies are absolutely the wrong way to warn of blown highlights.
1. The blinkies, as well as the histograms on the back of the camera are based on an in-camera created JPEG. Generally there are a couple of stops exposure, beyond the blinkies, before actual highlight over exposure occurs. My 5D2 has two and a third stops of latitude after the blinkies first appear. If you decide your exposure strategy based on the blinkies, you will be sacrificing from 1 to 2 EV. This is easy to determine, make an set of RAW shots (manual mode) and then increase the exposure by 1/3 stops. Open the shots in Lightroom. Starting with the shot where the blinkies first appear in the camera window note the Llightroom histogram and then the note the histogram when Lightroom shows the blown-out highlight alert.
2. While it is very difficult to find any information regarding the angular size of the in-camera exposure sensor, I found that my 5D2 with a 300mm lens has a ~1-degree spot. The tangent of 1-degree is 0.01746. If you assume that you are shooting a bird 100 feet away, the 1-degree exposure spot is 1.746 feet; which is as big as the bird.
Hi Stan,
Thanks but your comments are totally incorrect.
1) With experience you can definitely tell how much head room you have in RAW. The 5D2 is an obsolete camera in every way, its dynamic range is limited by FPN, with modern cameras there is no need to push the exposure so much and risk over exposing.
2) your second comment does not make any sense to me. the blinkies have nothing to do with the size if the exposure sensor. you don’t shoot a bird 100 ft away with a 300mm lens, the image will be an instant delete and a waste of time!
Good morning, Ari,
Thank you and kudos for providing invaluable tips and information, especially for capturing birds in flight. Your SmugMug galleries are sublime. A few questions:
1. Do you still prefer not to fine tune your bodies/ lenses (auto fine tuning of 500mm PF on D-850 of particular interest?) Life will be blessedly simpler if your answer is “yes.”
2. Does VR measurably degrade the image hand-held at high shutter speeds? If so, at what speed do you turn it off vis-a-vis the lens focal length? I prefer to have VR Active on to assist in tracking the bird, but I can do without it.
3. When do you expect to have guides for Nikon users available? Which of your Canon guides are useful for Nikon?
Hi Denis
1. I have never fine tuned a super-telephoto lens. My lenses never seem to need it 😉
2. VR NEVER degrades sharpness at high shutter speed. The claims along these lines are unsubstantiated and simply BS. There is no data to support it. I always keep VR ON (sport or active mode to avoid finder jump) as recommended by Nikon.
3. in less than a month the Nikon comprehensive AF guide will be available 🙂
Hi Ari,
You mentioned in one of your replies that “in less than a month the Nikon comprehensive AF guide will be available”, will this be an article on your blog page or a manual for purchase from your website?
Either way, I can’t wait to read it because there are very few experts writing these days that are comprehensive bird photographers, as in your case.
Thanks for your continued input into all facets of bird photography.
Bruce
Hi Bruce I am still working on the guide it is almost finished and will soon be ready for purchase!