Shooting at 1200mm a few tips and tricks
Introduction
The 600mm f/4 prime lens is one of the most popular super-telephoto lenses for bird and wildlife photographers. This big-six has been my workhorse for the past 2 decades across Canon, Nikon and Sony brands. With every generation the 600 has shed some weight and gained some in sharpness and AF performance. What makes the 600 very versatile is the ability to add the 1.4X or the 2X extender to increase the focal length to 840mm or 1200mm. The current Sony 600mm f/4 GM can take both extenders with little loss in contrast and sharpness. AF performance at f/8 aperture was the Achilles heel of the old DSLR cameras. It seriously hindered the usefulness of the 2X extender in the past. With modern high-end MLIC cameras such as the Sony A-1/A-9 series the AF is no longer a limiting factor at f/8 making the 1200mm combination ready for prime time.
Is it sharp enough ?
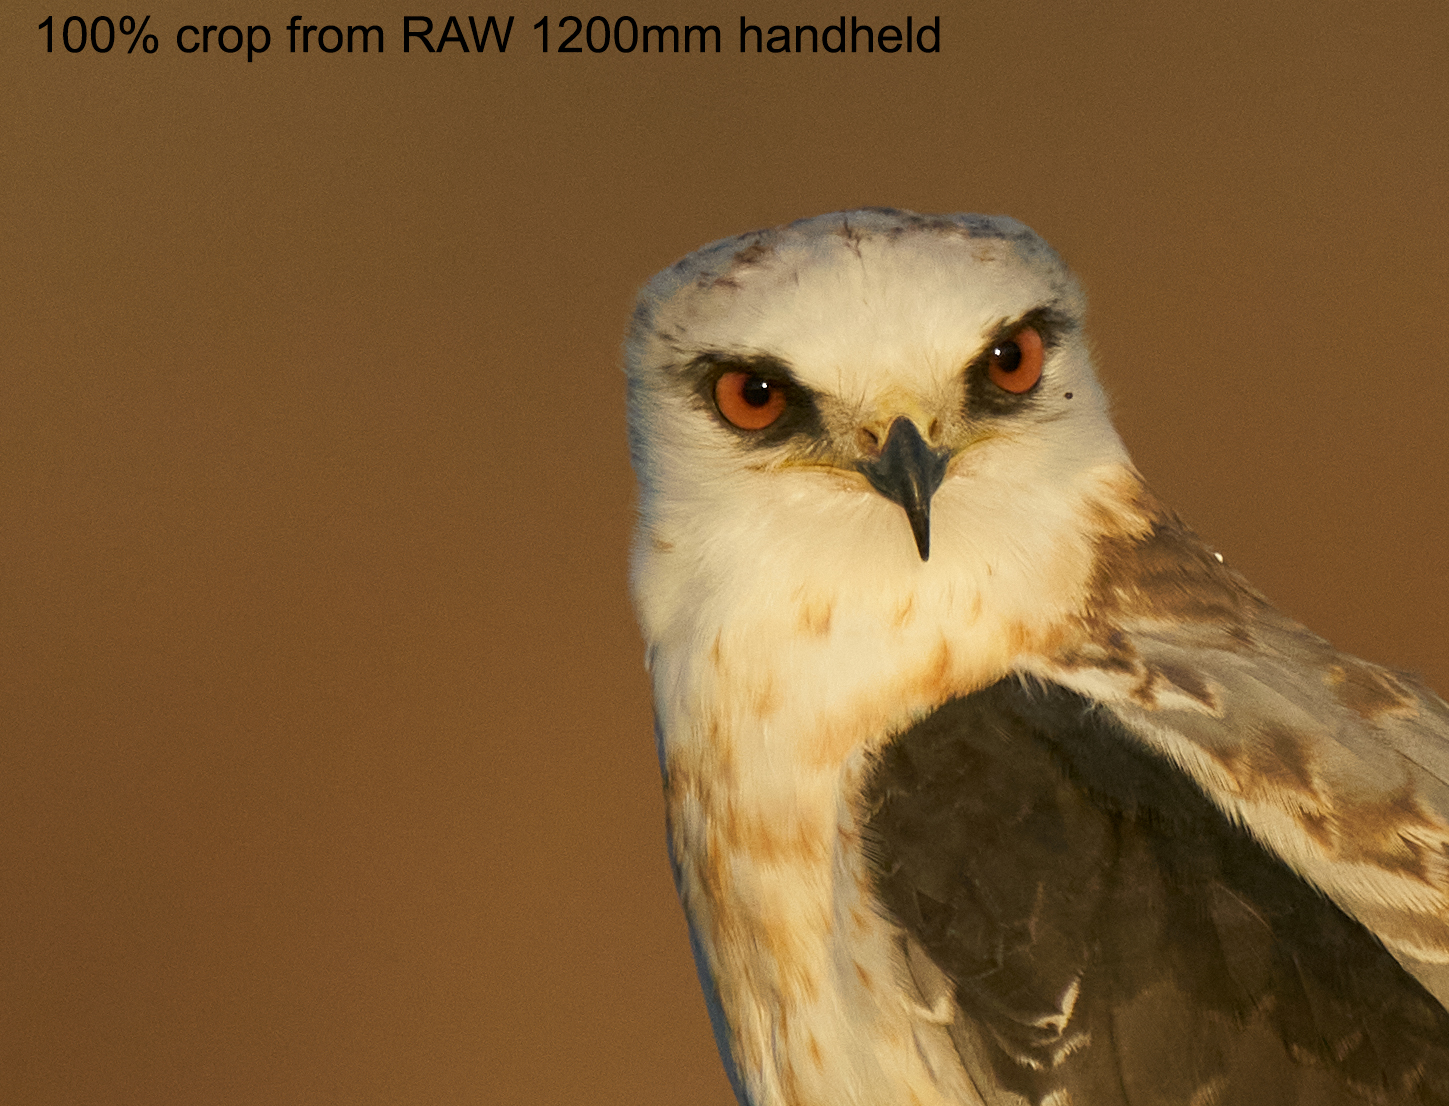
The first question that is often asked about the 1200mm combination is about sharpness. Is it sharp enough? The short answer is yes, but there are caveats. The unsharpened 100% crops below were made by shooting a static target with bare lens, with 1.4x extender as well as the 2x extender. With each combo I stepped back from the target to get roughly identical framing (I was standing quite a bit farther for the 1200mm shot). The quick and not perfectly ideal test reveals only a subtle drop in contrast / sharpness with the 2X extender relative to the bare lens on the unforgiving 50-mega pixel Sony A-1. Please note the target was printed by a consumer inkjet printer and wasn’t entirely a sharp reference . Nevertheless, one would expect more than satisfactory results with this combination at 1200mm even upon close inspection
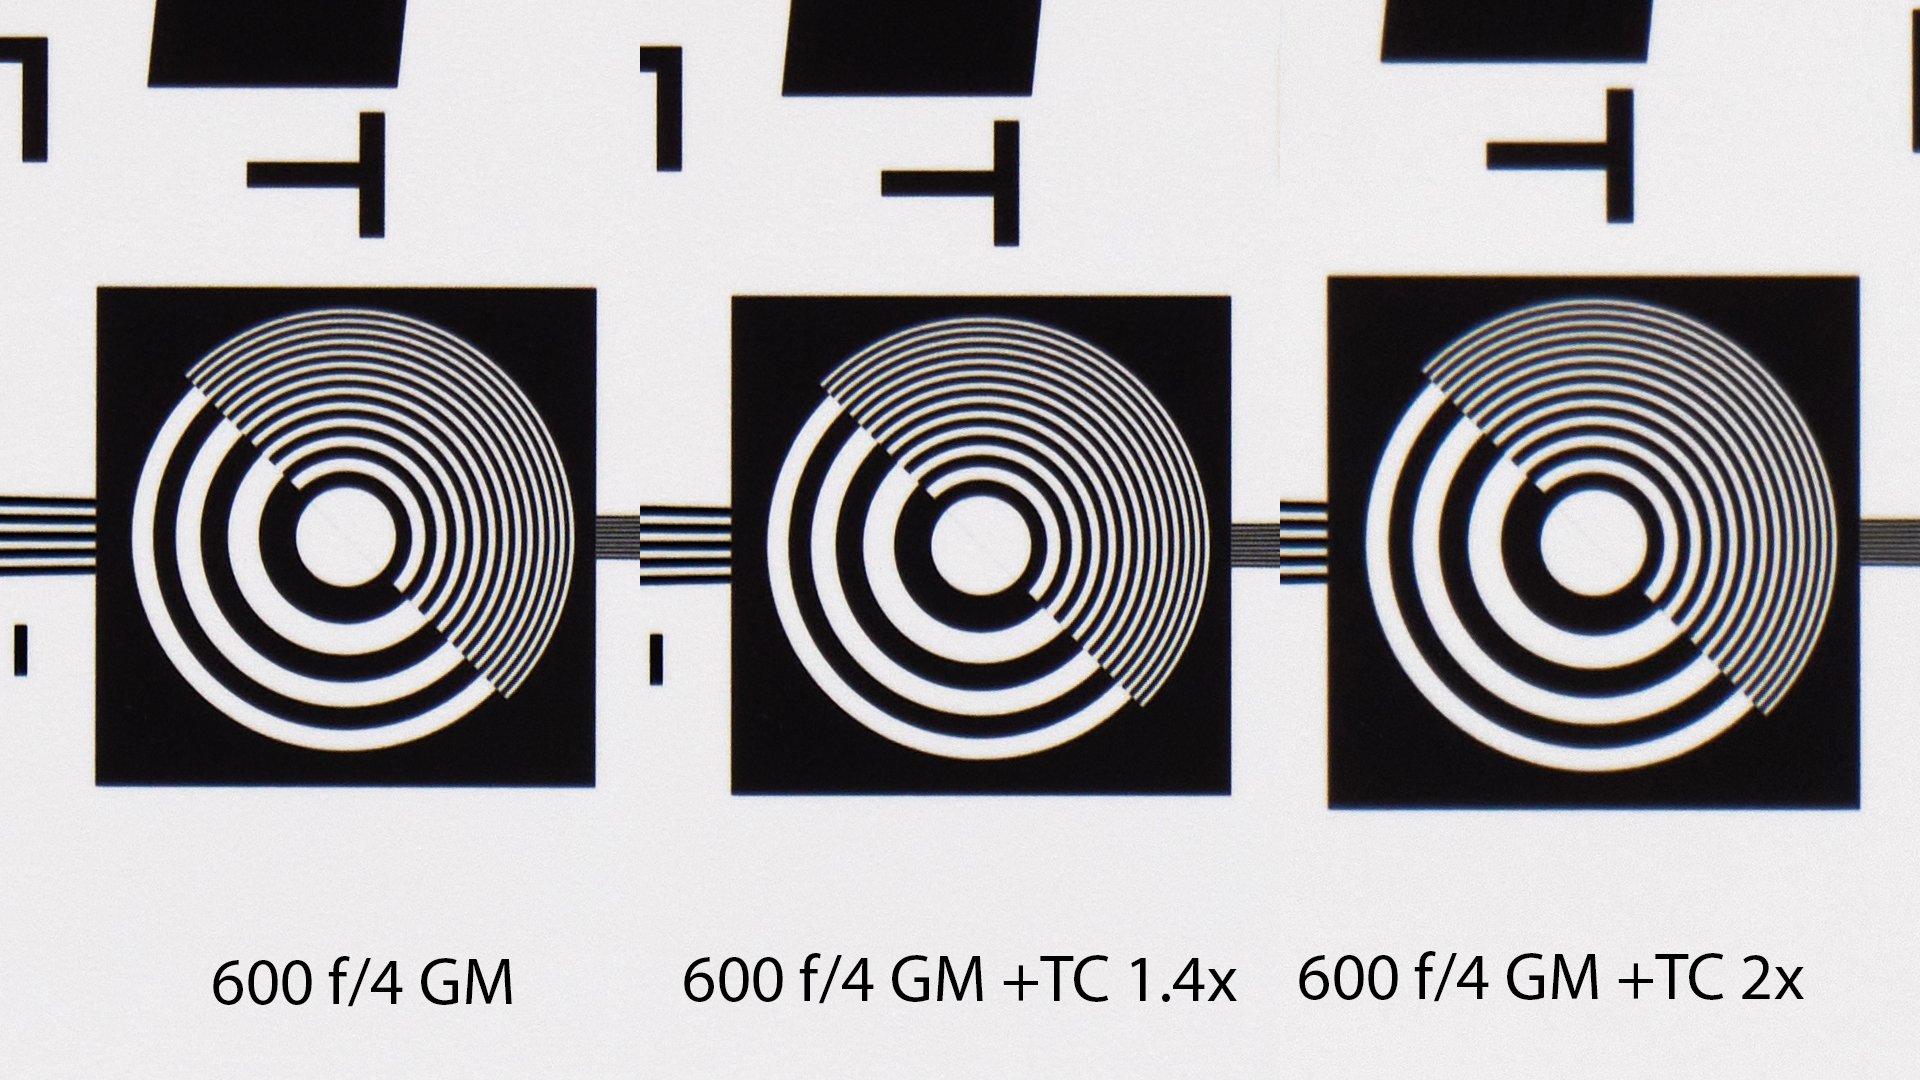
100% crops from RAW taken with FE 600m f/4GM left: bare lens, middle : lens + 1.4x TC, right: lens + 2x TC. Taken with Sony A-1 and processed with default settings in Capture One Pro. Target printer with consumer inkjet printer. Click on the image to enlarge. The shooting distance was not controlled accurately and the target was moved to roughly give the same framing of the target
After processing the images, the 1200mm combination can produce results indistinguishable to the bare lens as the seen in the examples below

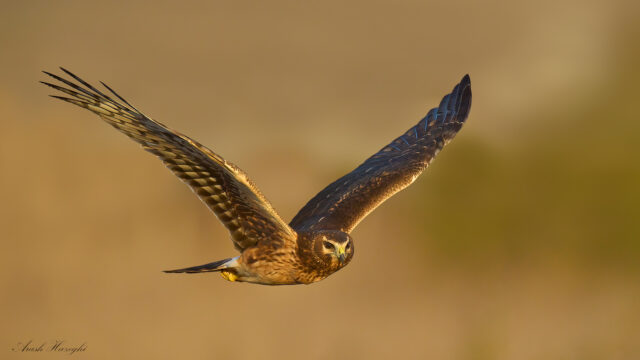
Female northern harrier, Sony A1 600mm f/4 GM + 2X TC (1200mm) f/8 ISO-3200 1/3200 sec. handheld. processed with C1P. Click on the image to enlarge
The AF performance of the MLIC camera is less sensitive to the maximum aperture of the lens given the nature of the AF technology in these cameras. This means the AF tracking remains accurate and consistent even at f/8. The initial acquisition at 1200mm is tricky given the small field-of-view (FoV) and requires plenty of practice to master.
Western Sandpiper in flight, Shooting very challenging subjects such as this small and fast bird at 1200mm requires much practicing and mastering the flight techniques. After adding the TC, the rig’s center of mass will shift froward away from the camera so more practice might be needed to get used to this combo than the bare lens. Please see my flight photography guide for details.
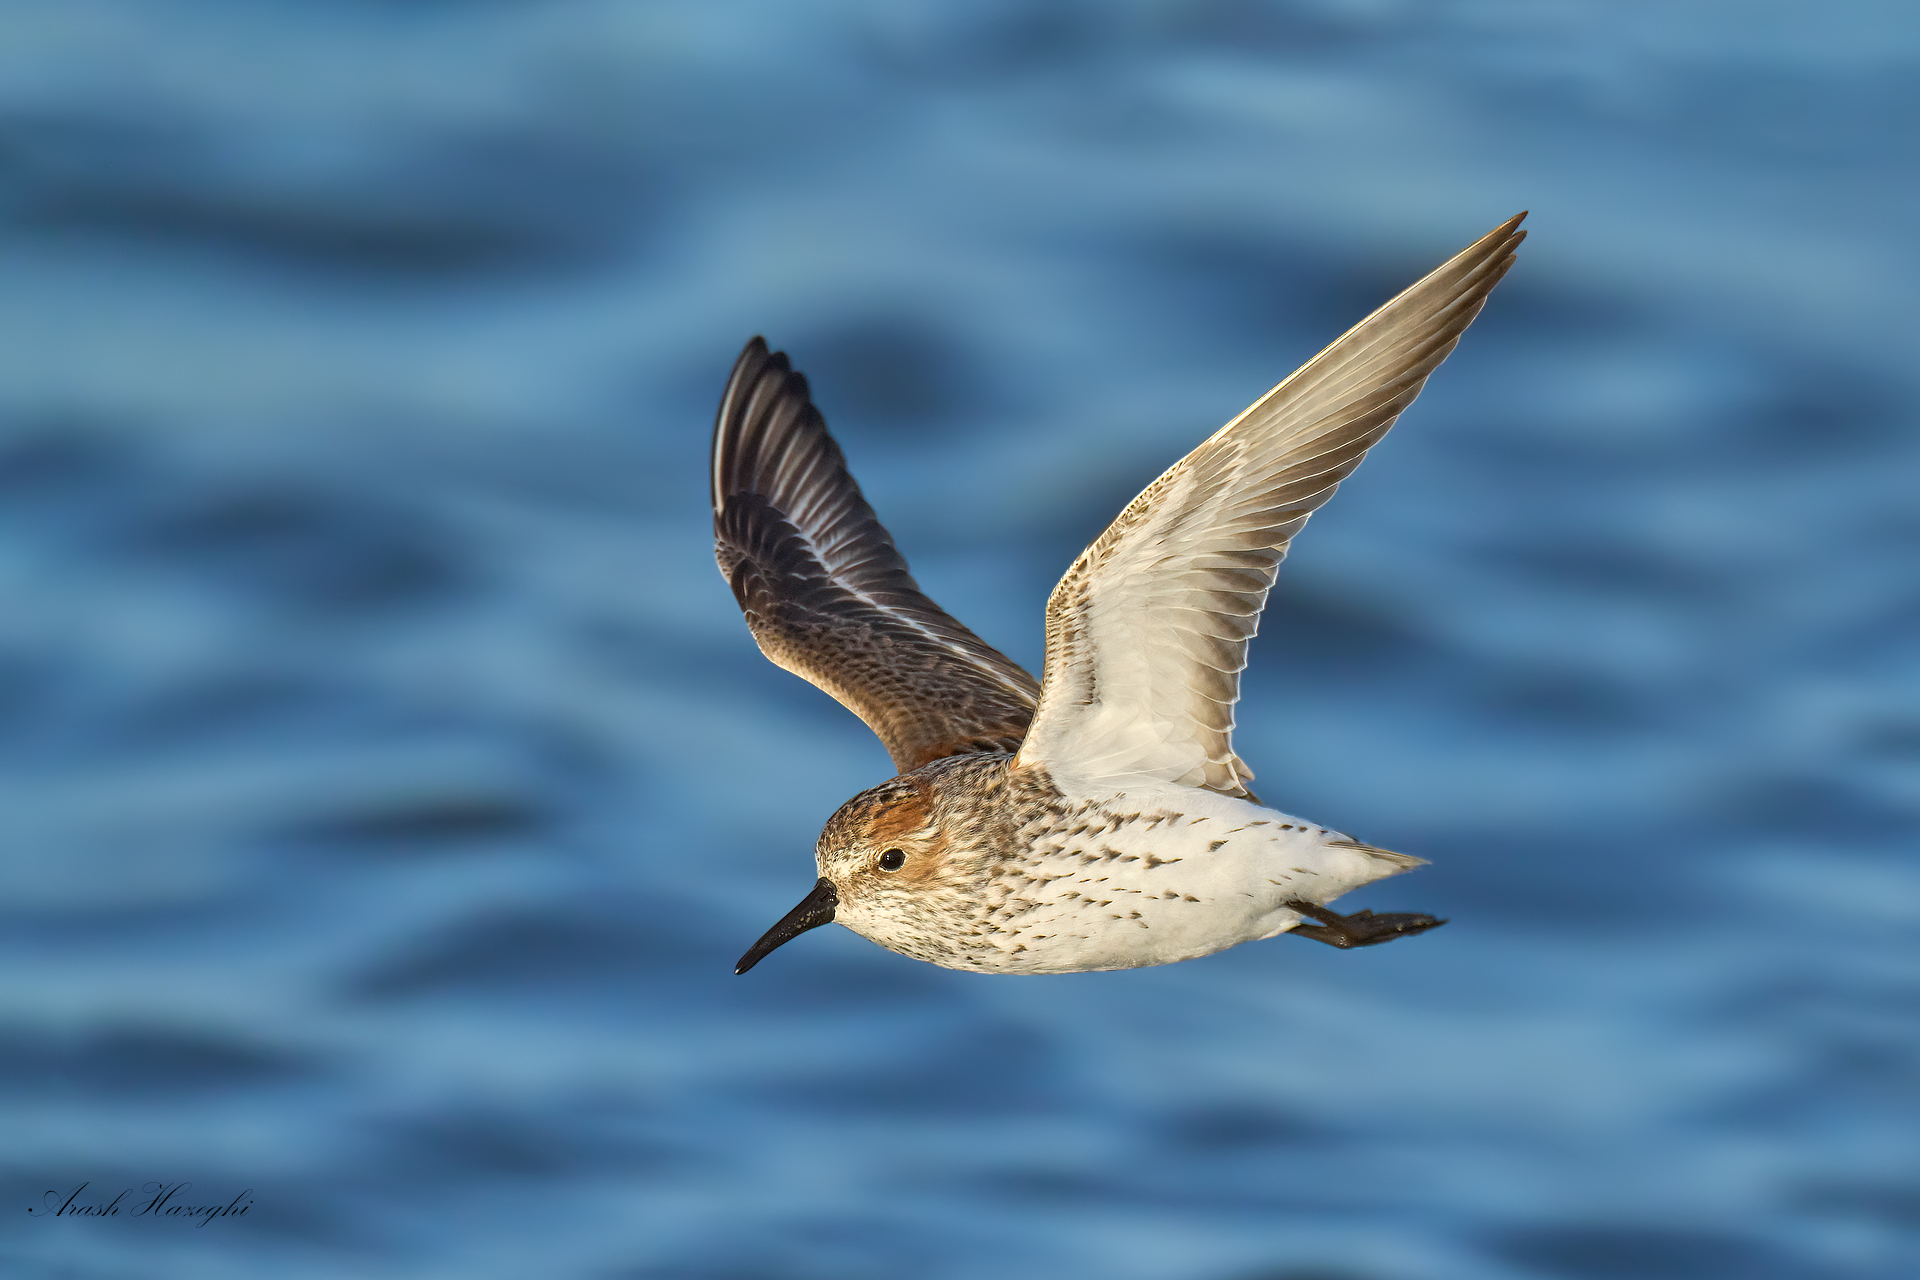
Western Sandpiper. Sony A-1 and 600mm f/4 GM + 2X TC, f/8 ISO-2000 1/4000 sec handheld. Click on the image to enlarge
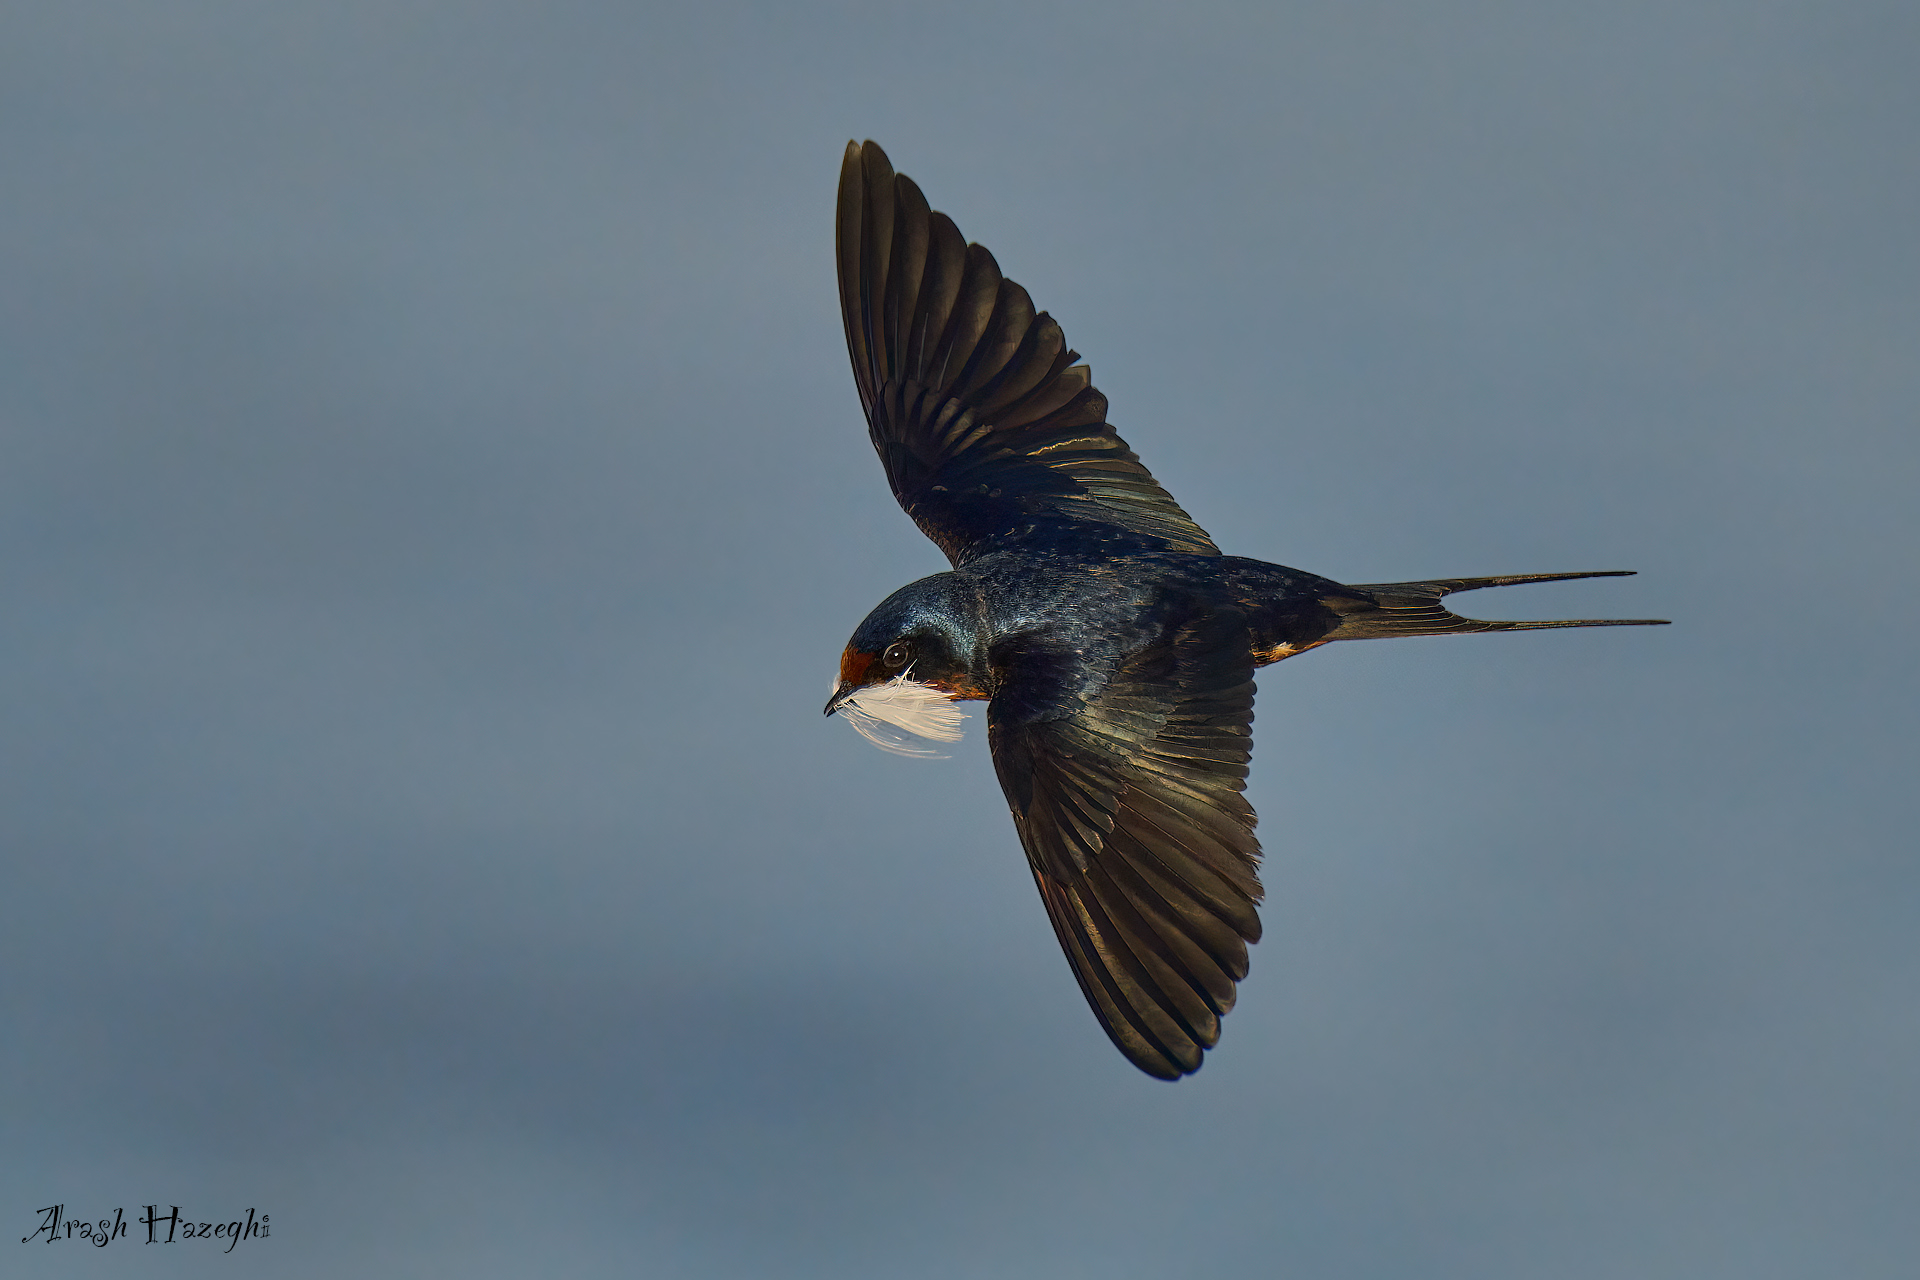
Barn Swallow, Sony A1 and 600 f/4 GM + 2X TC. 1200mm ISO-2000 f/8 1/4000 sec. Handhled processed with Capture One Pro. Click on the image to enlarge.
Mixed performance ?
The bare 600 is universally loved by the photographers. The 2X extender however, generally gets mixed reviews. There are many examples of poor images-soft or otherwise mediocre- made with this combo often cited as the proof of its lack luster performance. But there are some great images too. So where does the difference comes from ?
When looking at my images made in the past 3 years after switching to Sony, I can find plenty of images at 1200mm which can only be described as sharp upon close-up inspection. Some 30-40% of my Sony images to date are made at 1200mm. Shooting at 1200mm is a necessity sometimes, birds such as a white-tailed kite cannot be approached in the wild without a blind or some attraction technique.
Furthermore, the long focal length can help mitigate a steep shooting angle. It can also make certain shots easier to capture, for example panning with a fast bird that is flying farther away as opposed to too close to the camera.
In this short article I will discuss a few points about shooting at 1200mm and why it can be so frustrating at times.
Factors that impact image quality at 1200mm
I will start with a few factors that impact the image quality at 1200mm. The most important factors include atmospheric refraction (aka shimmers), shutter speed, harsh light and low light.
Atmospheric refraction (Heat shimmers):
Atmospheric refraction is caused when light travels through non-homogeneous air, pockets of hot and cold air have slightly different density and thus different index of refraction. The light will refract according to Snell’s law when crossing these pockets. The end result is constantly changing optical path between the subject and the camera. This effect can easily be seen by the naked eye when looking over a hot BBQ pit. The “shimmering” background is quite visible. The same effect causes the stars to appear flickering at night. The shimmers between the camera and the subject can make the subject to appear extremely soft in a high resolution photograph, even when the shimmers aren’t visible to the naked eye.
This effect is not limited to warm temperatures, it can also happen in a very cold day as the ground quickly warms up by the sun, causing a draft. The farther the subject from the camera the more likely that the light will have to pass through non-homogeneous air , causing loss of sharpness. In most cases the image is grossly soft beyond repair. “Star” like catchlight on the subject’s pupil and a “wavy-looking” background are all signs of the heat shimmers. I originally wrote about heat shimmers on my blog about a decade ago. Needless to say today’s high resolution sensors, such as the 50-mega pixel sensors in the A-1, are a lot more susceptible to the shimmers. Shimmers are the number one reason why images at 1200mm appear soft/hazy. Such examples are posted online almost daily causing alarm, often wrongly attributed to a faulty AF or bad optics.
some typical examples of heat shimmers are provided below.
“start” catchlight and specular reflections are text book signs of the heat shimmers
Bufflehead in flight. Image impacted by heat shimmers, shot with the Sony A1 and 600mm f/4 GM + 2X TC. 100% crop from RAW. click on the image to enlarge
The images below are perhaps the best examples of the real-world shimmer situation I could find in my archive. The young skimmer was circling above a pond. I happened to capture bursts of the bird from a similar distances as it repeated the same flight path multiple times. It was a warm day, late afternoon. Almost all the frames in the first burst were soft and disappointing like the image below.
Softness from heat shimmers at 100% RAW crop. Image taken with the Sony A1 and 600mm f/4 GM + 2X TC (1200mm). Click on the image to enlarge, Image taken in early afternoon on a warm spring day.
A breeze picked up just before the last pass. The shimmers dissipated after the breeze for a short while, giving visible improvement in the images. The image below was taken not long after the one above. The improvement is noticeable. the beak serration are rendered and the low contrast feathers have picked some texture. The catchlight is better defined as well. At this point the image becomes optimal for post processing and presentation. Had it been a windy day, I am confident the results would have been even better.
Juvenile black skimmer. Image taken with the Sony A1 and 600 GM f/4 + 2X TC. 100% crop from RAW. click on the image to enlarge. The image has reached optimal sharpness after the evening breeze started to blow above the pond.
If I were shooting with 600mm bare lens, the skimmer would have needed to be a lot closer to get the same size subject in the image, and the effect of the heat shimmers would have been a lot less.
As the sun set and temperature dropped to 60’s the conditions became better, most images were now becoming sharp at pixel view. The skimmers left before the sunset but the ideal sharpness can be seen in the example below (100% crop from RAW, northern shoveler) captured in the same area late evening just before the sun set.
100% crop from raw with standard capture one pro settings. Sony A1 with 600mm f/4 GM + 2X TC (1200mm) f/8 ISO-2000 1/4000 sec handheld. click on the image to enlarge
The heat shimmers are usually present all day long, except for very early morning or very late evening when the wind picks up. Most of my images taken with at 1200mm tend to be late in the evening when the sun is just about to set. This might sound counterintuitive, as attaching the 2X TC will reduce the maximum aperture to f/8 and require a high ISO setting to keep the shutter speed fast.
But this is the time when images are far less likely to be impacted by the shimmers and retain critical sharpness. Modern cameras such as the Sony A1 perform very well at high ISO, with careful processing, the high ISO noise can be removed with little impact on the fine details (please see my post processing guide for the details). The softness seen in the bufflehead image above cannot be corrected in any post processing. For this reason I recommend using your 2X TC only in the early hour of the morning and the last hours of the evening. As a rule of thumb if the ISO is below 800 the conditions are unlikely to be ideal for shooting at 1200mm. 99% of my 1200mm images were taken at ISO-1600 or higher.
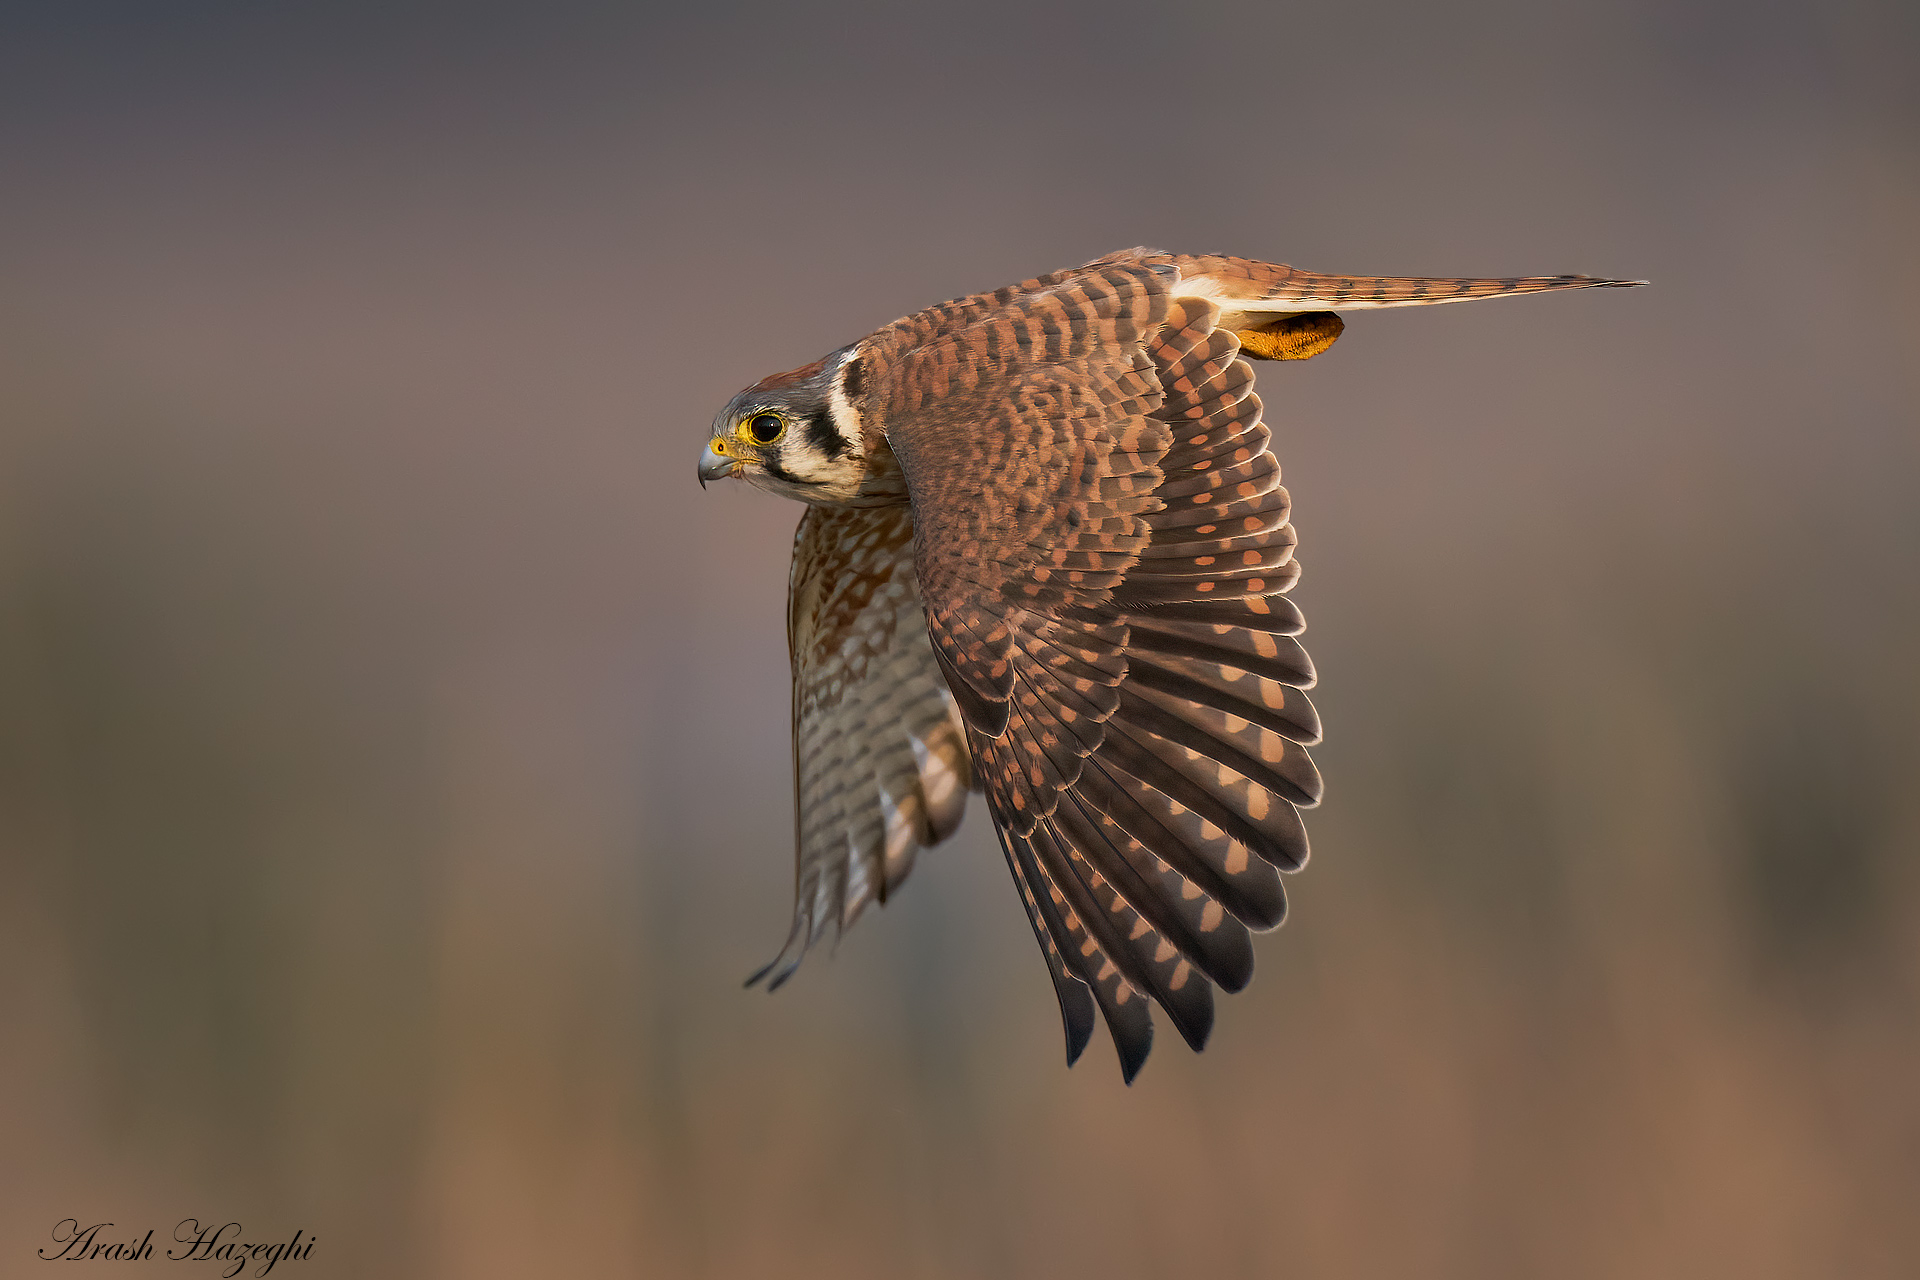
American Kestrel, Sony A9 II 600mm f/4 GM + 2X TC (1200mm) f/8 ISO-2500 1/3200 sec. handheld. processed with C1P. Click on the image to enlarge
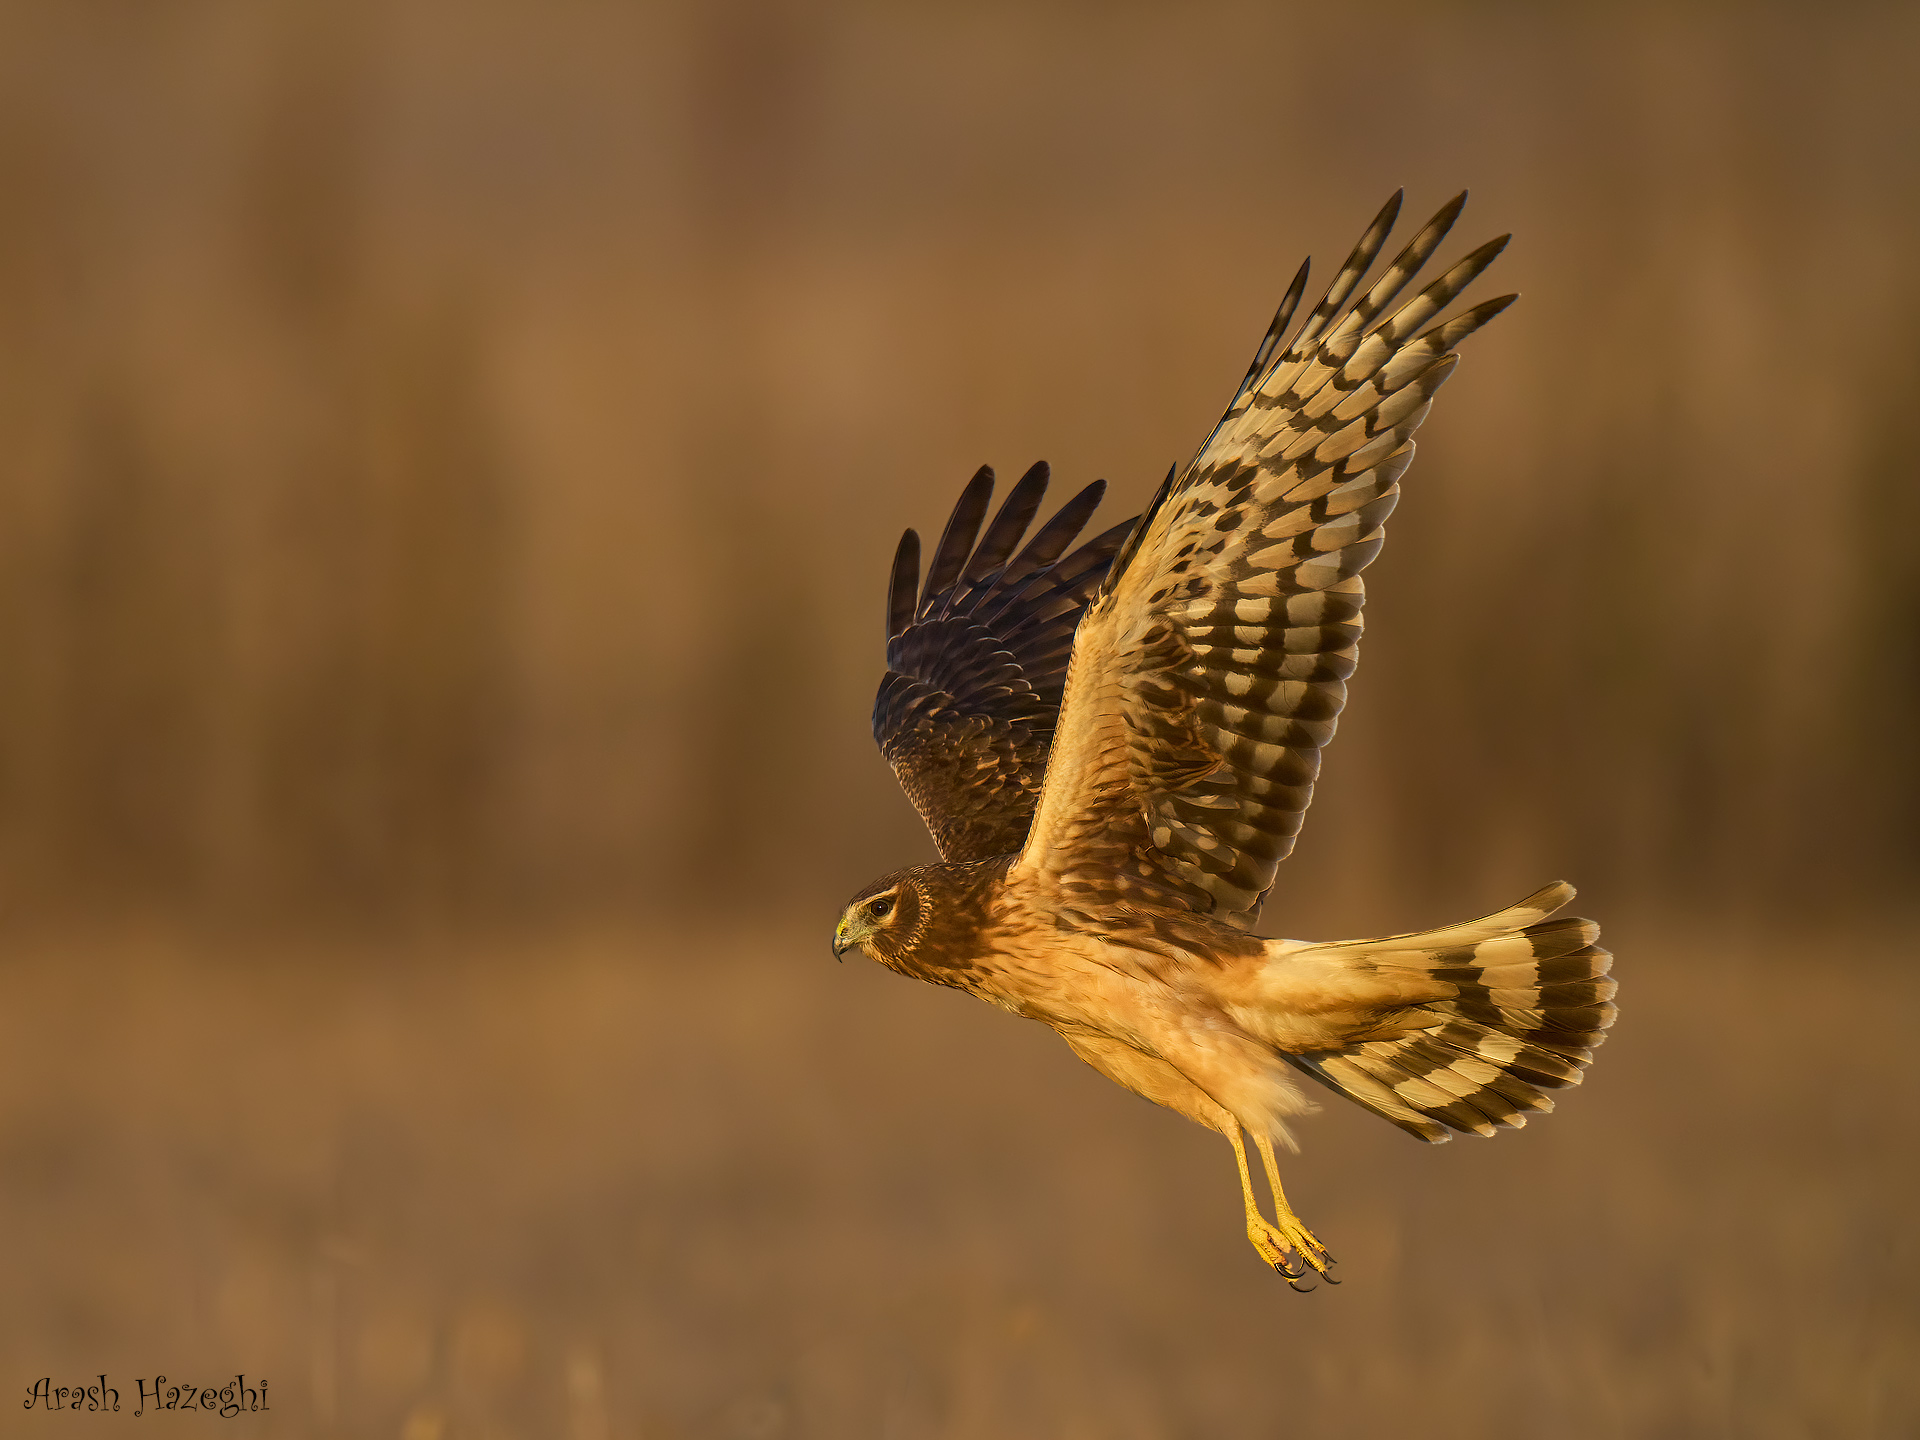
Female northern harrier, Sony A1 600mm f/4 GM + 2X TC (1200mm) f/8 ISO-3200 1/3200 sec. handheld. processed with C1P. Click on the image to enlarge
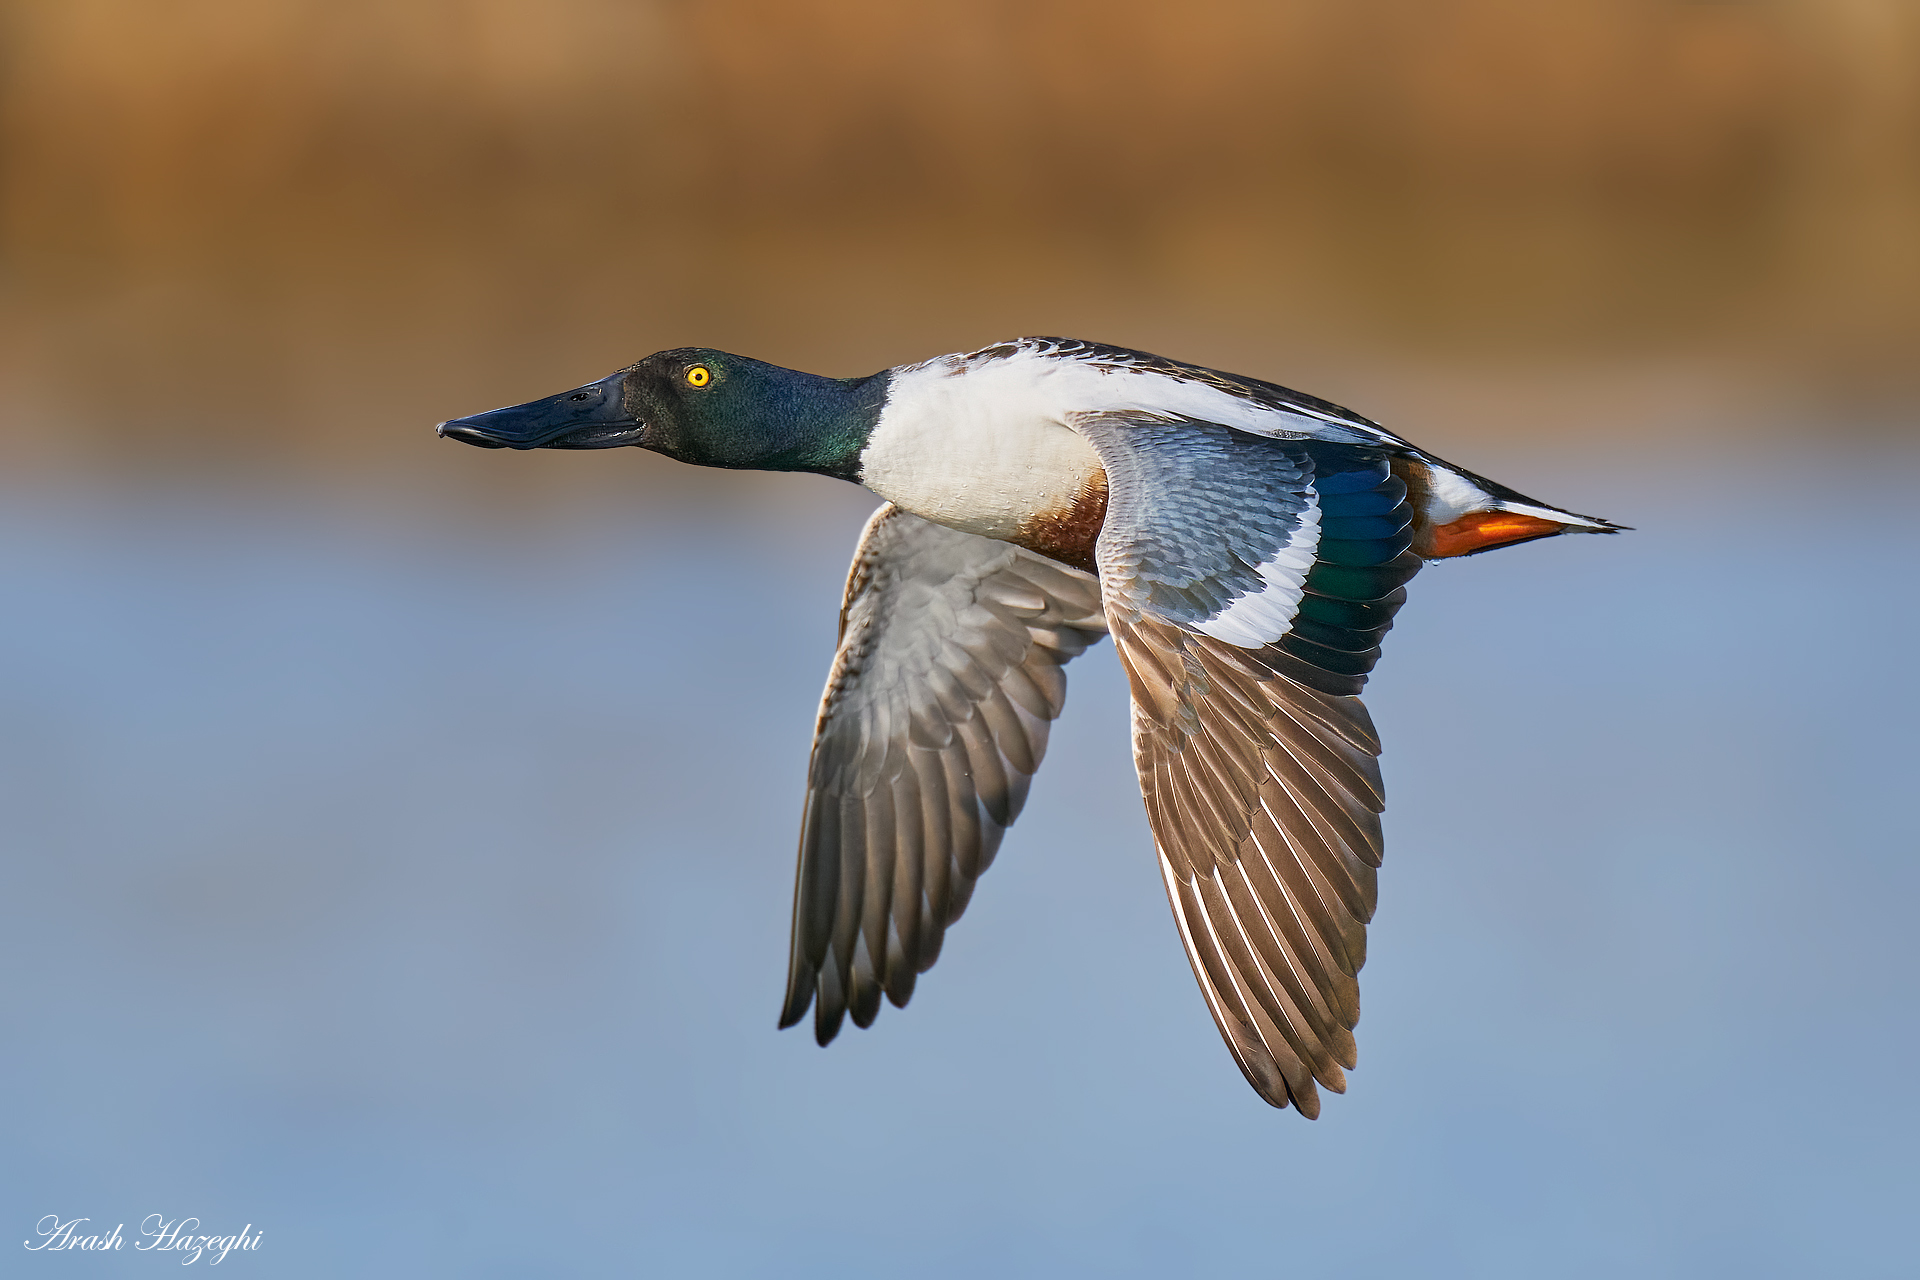
Northern shoveler (male), Sony A9 II 600mm f/4 GM + 2X TC (1200mm) f/8 ISO-1600 1/3200 sec. handheld. processed with C1P. Click on the image to enlarge
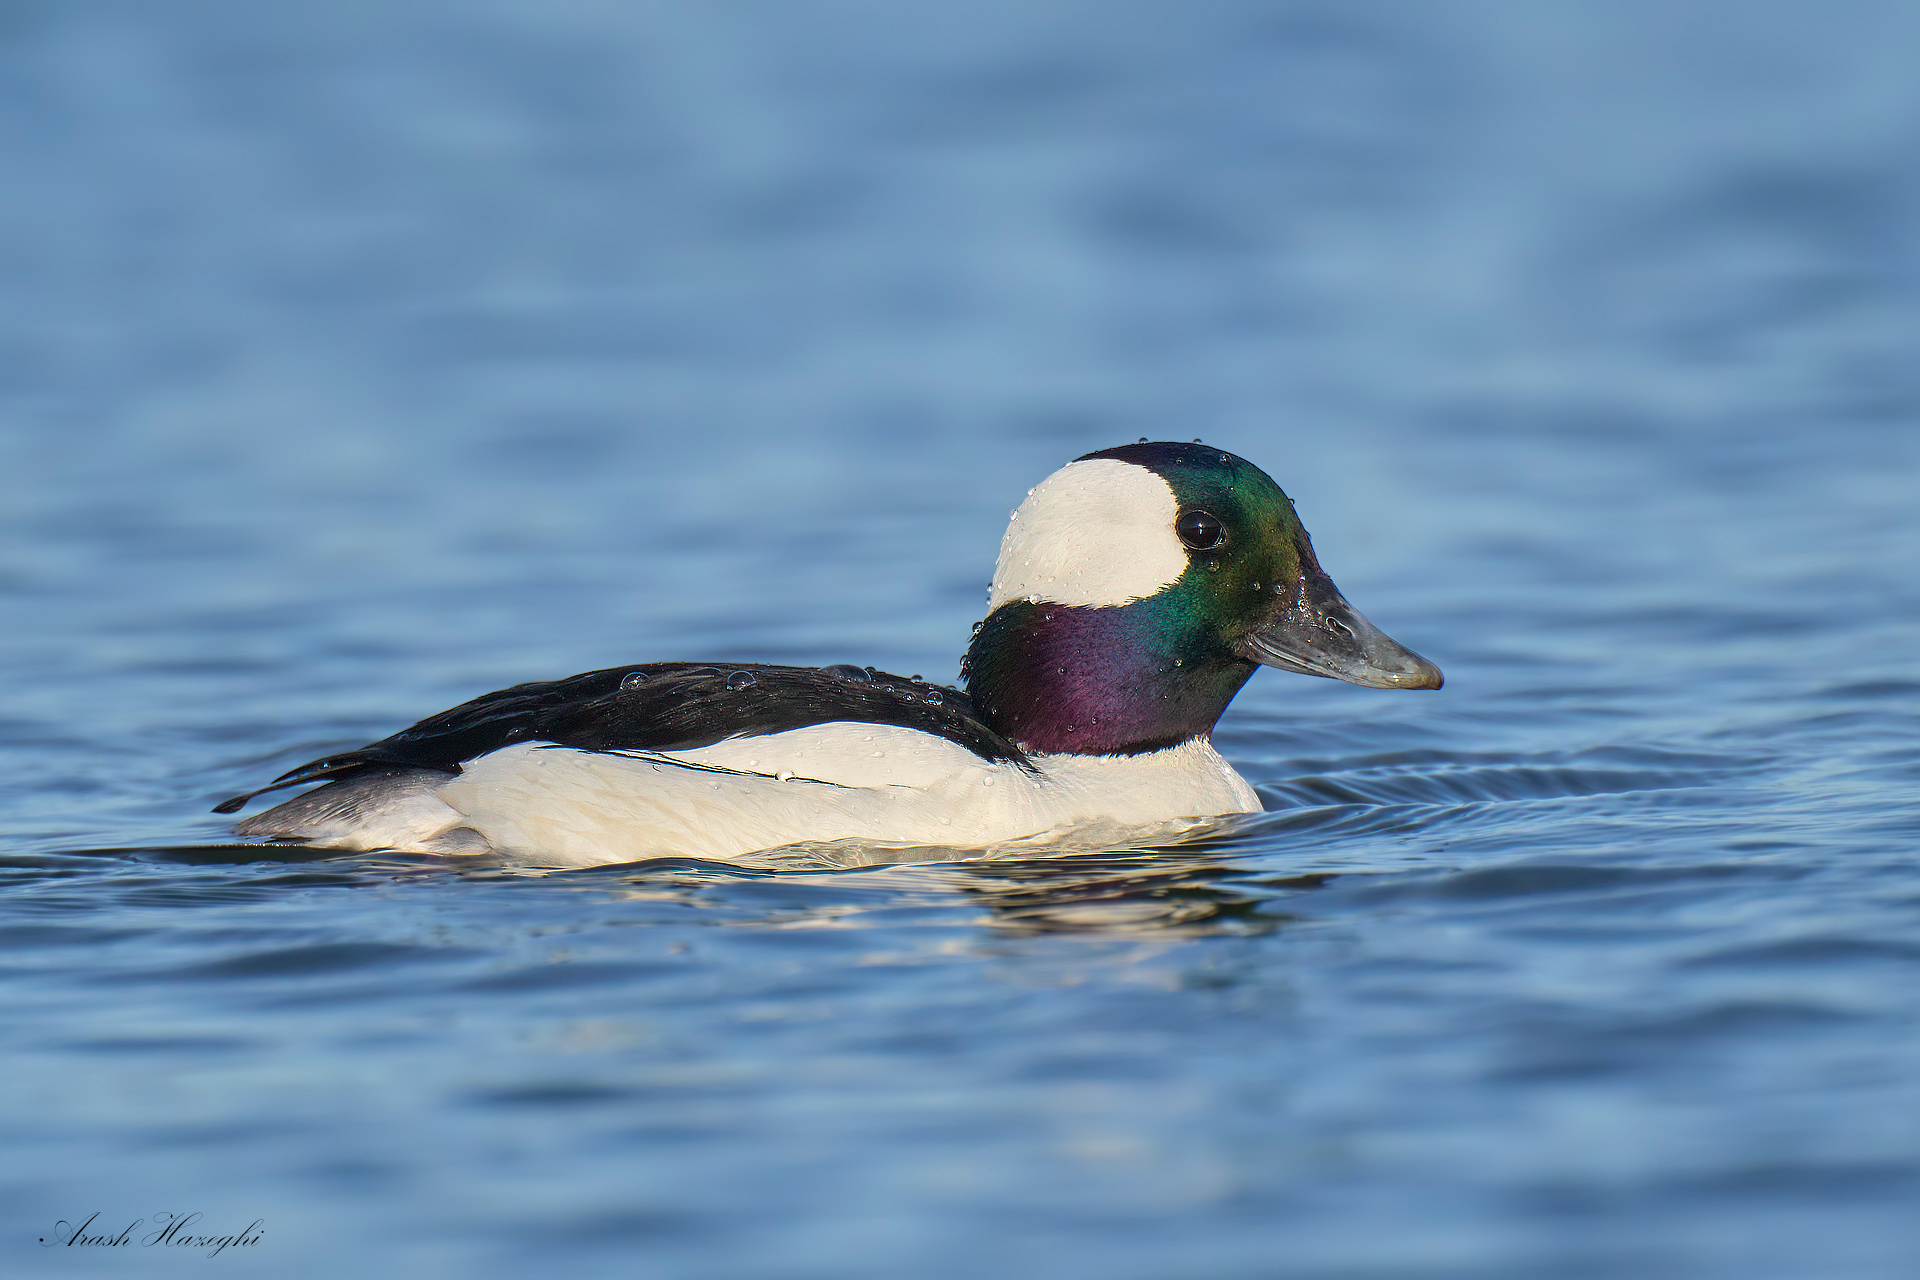
bufflehead Sony A1 600mm f/4 GM + 2X TC (1200mm) f/8 ISO-1600 1/3200 sec. handheld. processed with C1P. Click on the image to enlarge
Shutter speed
If you are shooting at 1200mm your shutter speed must be faster than 1/4000 sec when panning, or at least 1/3200 sec for a static subject. Raise the ISO to reach the minimum shutter speed. This is even more important if you handhold your lens like me. Shooting at a low shutter speed like 1/2000 sec will result in a soft image. At first glance the softness may not look like distinct motion blur, but it is coming from tiny movements during exposure. If you cannot shoot at 1/3200 sec or faster with a reasonable ISO, it’s time to take off the 2X and shoot with the bare lens. A heavy crop in this case will give better results than an image that is both soft and grainy.
Shooting in low light is not an option
I talked about using high ISO and a fast shutter speed at last light or at first light for best results. But this does not mean shooting at “low” light such an overcast day, or a dim winter day. To recover slight contrast loss from the 2X, the images need a bit more sharpening and also more noise reduction to eliminate the grain. This process works when the subject is fully and uniformly lit by the sun. If there is not enough light the image will be too grainy for sharpening and ultimately will not produce an acceptable result. Low light shooting requires maximum micro-contrast from the optics in order to produce a high definition output. Cloudy and dim days are a no-go for 1200mm. In locations where light is low such as AK or British Columbia in winter, the 2x TC is not a useful tool.
Full and uniform frontal lightning creates a high fidelity raw file that can be processed to create results like the image below (White-tailed kite)
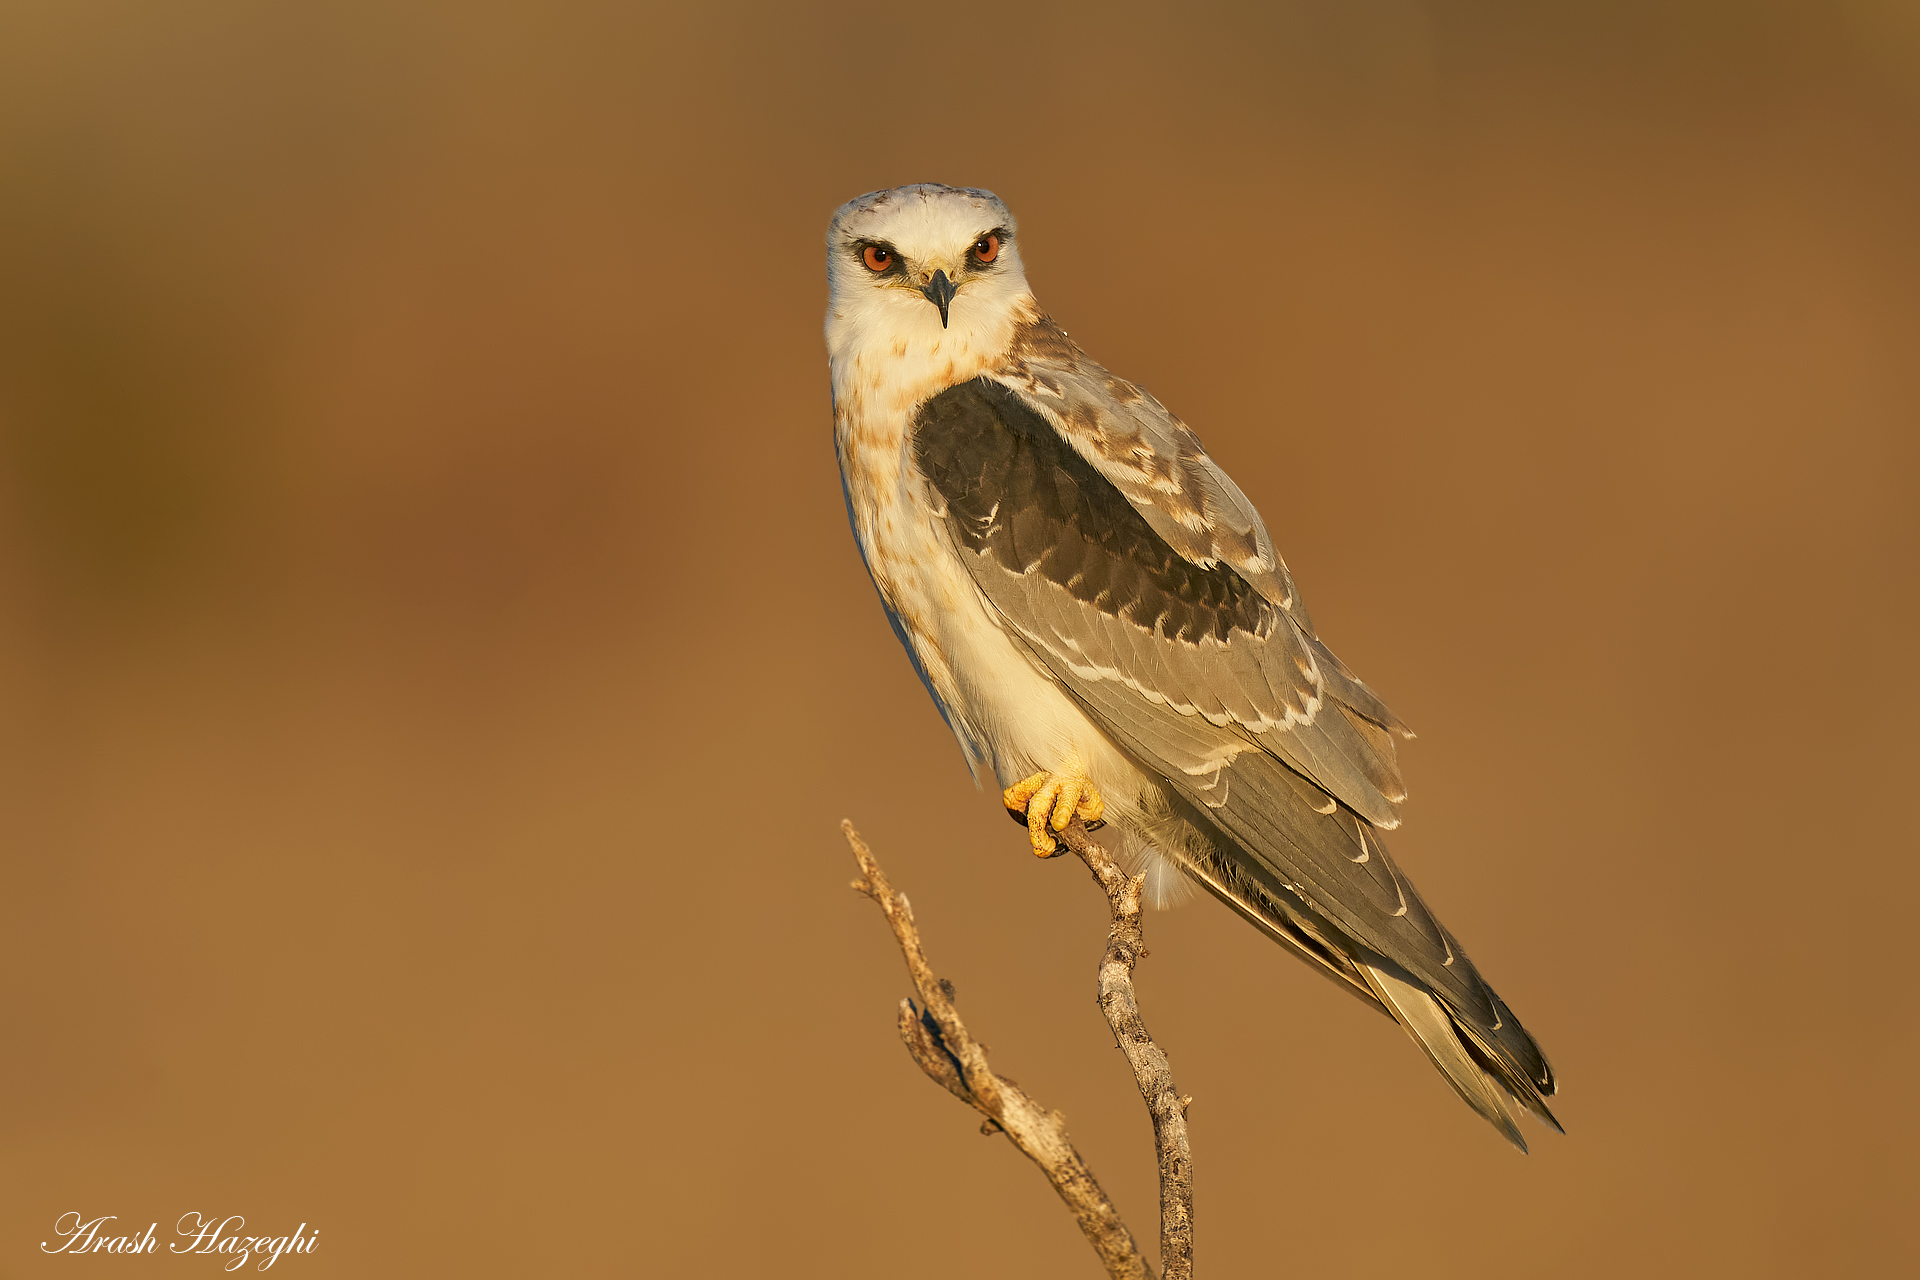
White-tailed kite, Sony A9 II 600mm f/4 GM + 2X TC (1200mm) f/8 ISO-2000 1/3200 sec. handheld. processed with C1P. Click on the image to enlarge
Avoid deep shadows when shooting at 1200mm, these areas will be hard to recover at high ISO and when more sharpening is needed.
100% crop from RAW. click to enlarge. Lack of deep shows on the subject is very important in producing a high quality output.
Location, location and location
Given the factors discussed above it is easy to conclude shooting at 1200mm is not an option in certain locations. Desert with shimmers and dust, very humid locations, or winter locations in low light are not ideal for shooting at 1200mm. Save yourself the frustration and don’t try the 2X TC. Coastal areas with mild weather and constant wind/breeze and bright skies such as California coast are ideal for using a 1200mm. High altitude locations in the midwest with clear skies are another area where 1200mm can be used.
Shooting at 1200mm will not be very productive as an everyday activity. It needs planning and care, but in the right condition it can yield excellent results.
Conclusion
I hope this short article help you understand the issues around shooting at 1200mm (or the combination of a long lens + 2X TC) a bit better and reduce the frustration when using this combo in the future.
Great article Ari.
Thanks.
Very instructive Ari with brilliant examples (as usual!). I’m sitting here nursing a hip replacement and this article has given me the urge to “get back on the horse”! Here in Australia I have not been able to visit our wetlands for a few years to photograph our summer waders that have travelled from Siberia. Your article is a big incentive to do my rehab correctly, so that I can get out there before the waders leave at the end of summer.
Many thanks!
Thank you very much for the primer. Your generosity in sharing hard-won info is very appreciated!
I cling to my DSLRs for many documentarian-like things (the 1DX III focuses on things I cannot even resolve with the naked eye), but for birds the A1 seems to reign supreme. Just starting out in birding.
I’ll see what the Canon R1 brings to the table this spring and then decide.
Thanks again!